OBS Websocket
Connect adaptor:ex to OBS Studio via the OBS Websocket protocol.
The Plugin allows you to control OBS Studio. For example to switch scenes, adjust settings or react to changes.
You can find more information about OBS Studio at obsproject.com.
Setup
Activate Websocket in OBS Studio
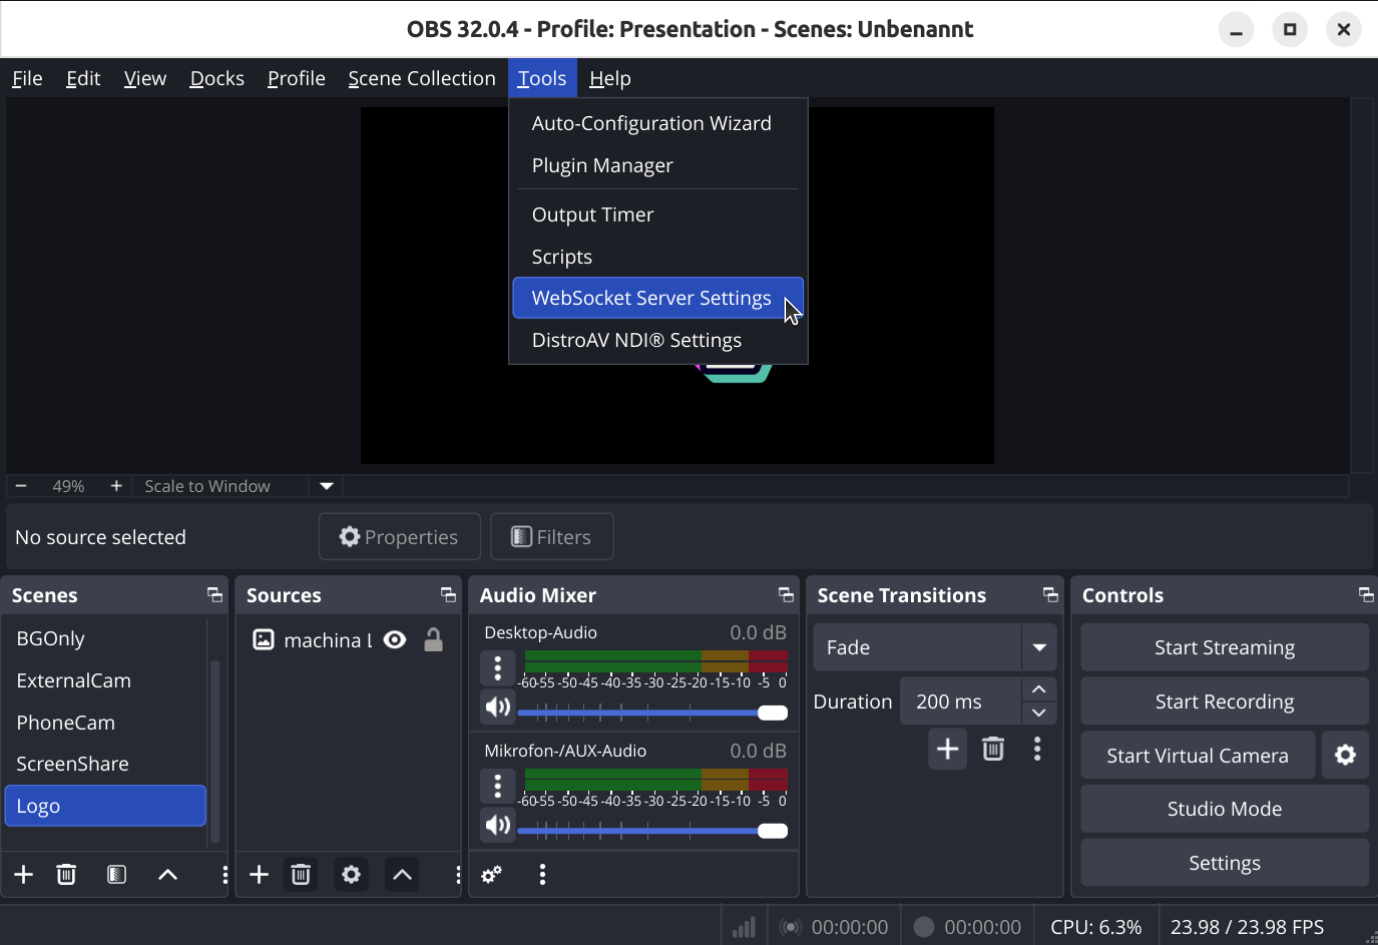
In OBS Studio, open the Websocket settings in the menu under Tools > Websocket Server Settings.
Set up the websocket connection. Activate the websocket with enable WebSocket server and add password authentication if you want to.
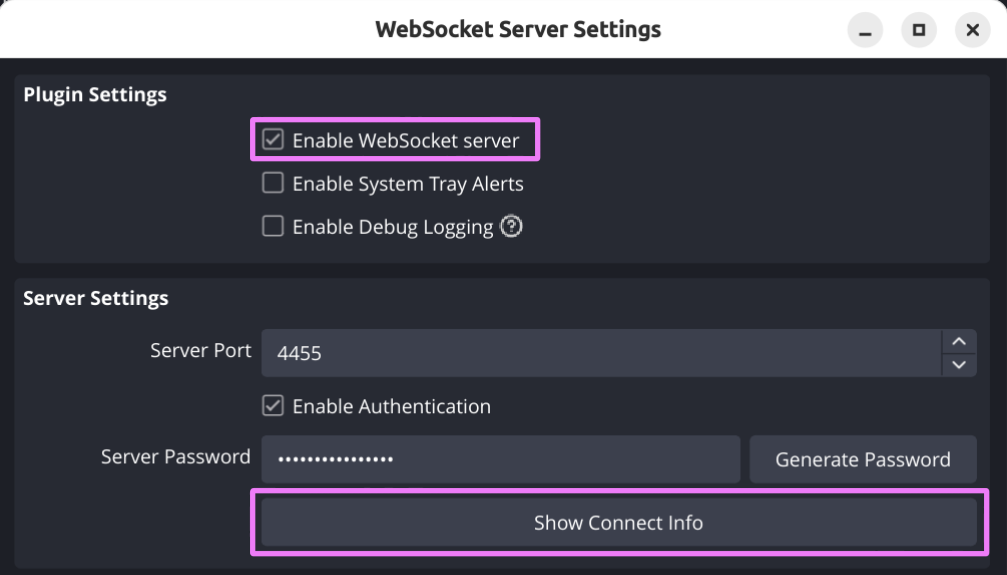
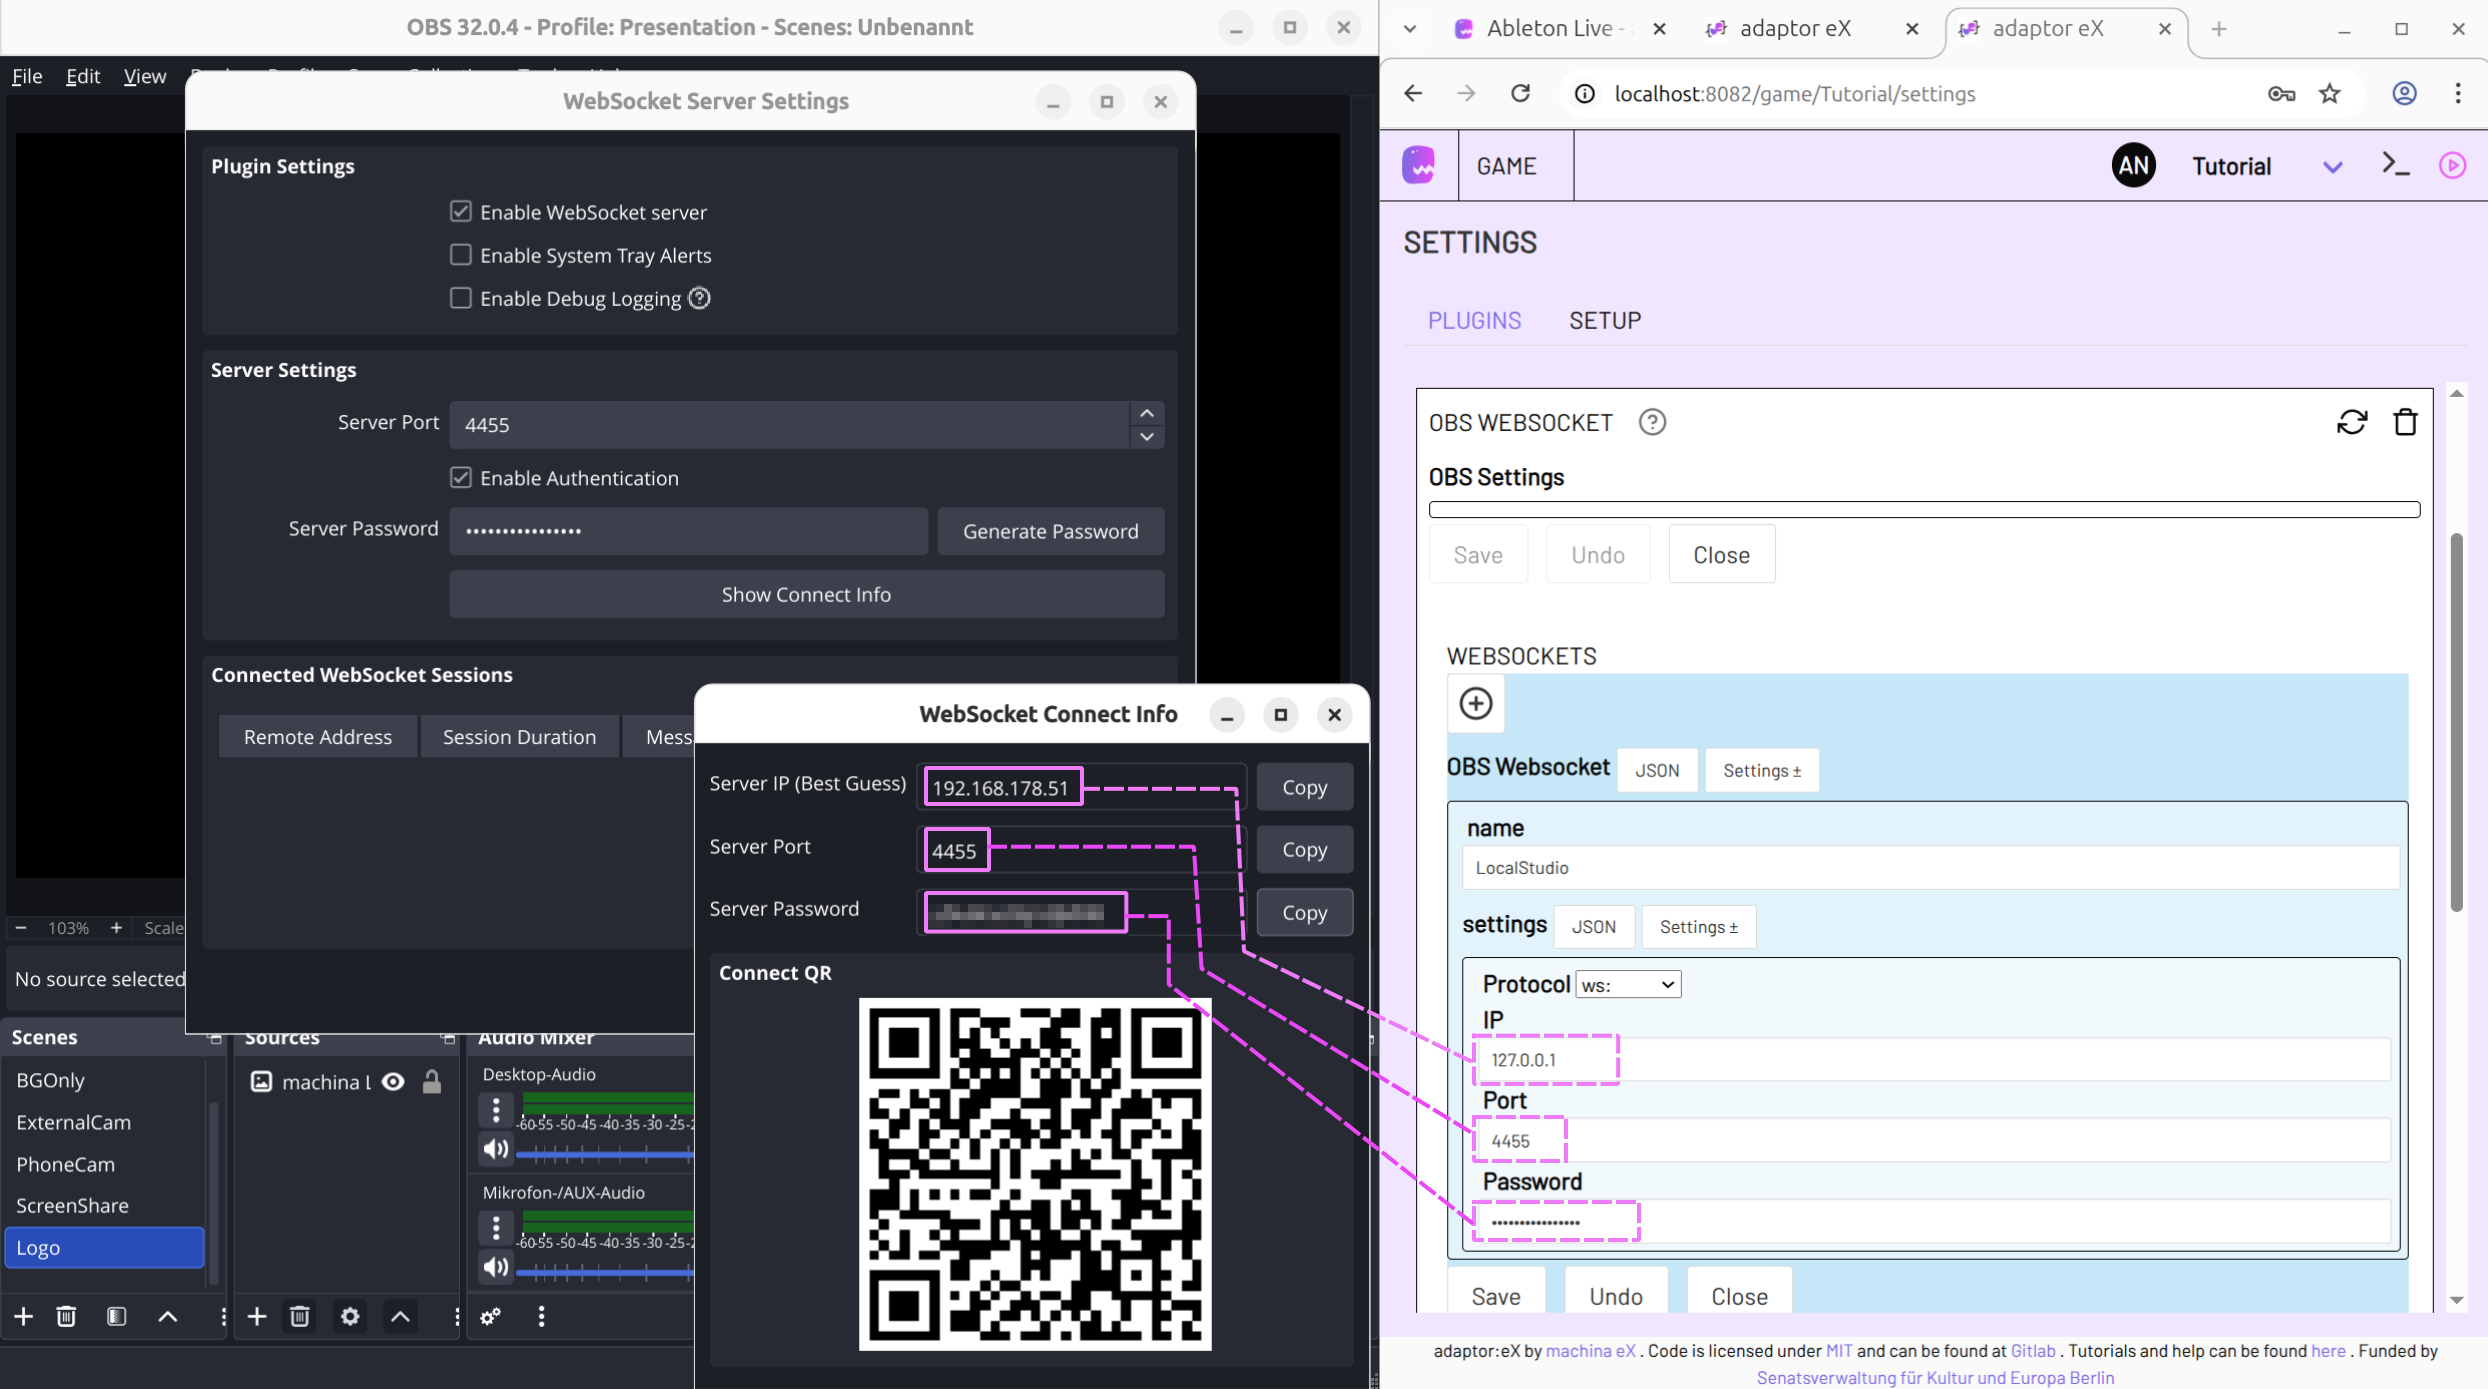
Click on Show Connect Info to display the connection information. Once you have activated the OBS Websocket Plugin in adaptor:ex, you can copy the information from here.
Connect websocket with adaptor:ex
In adaptor:ex, add OBS WEBSOCKET under Game > settings to your game plugins.
Create a new Websocket and enter a name.
The name is how you identify this websocket connection later on when adding OBS actions in the level editor.
Copy the connection information from OBS Studio and paste it into the plugin settings.
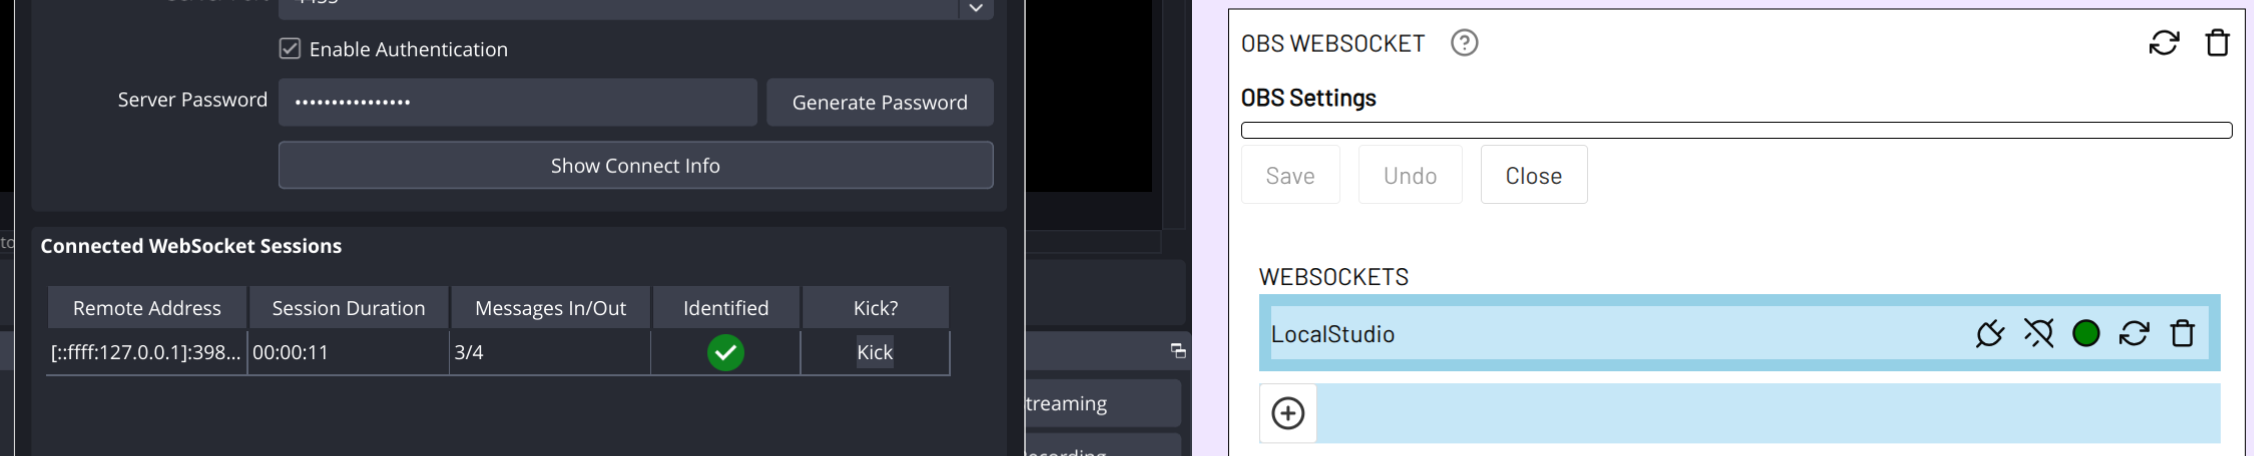
Click on SAVE. If the connection was successful, the circle in the plugin settings should turn green and a new connection will be displayed in the WebSocket settings in OBS Studio.
Note
If OBS Studio and adaptor:ex are running on the same computer, you can usually use localhost or 127.0.0.1 for IP.
You can add more websocket connections if, for example, you have multiple computers running OBS Studio on the same network.
Info
Use a VPN connection, e.g. via Wireguard, to connect OBS Studio to adaptor:ex on a remote network or server.
Use the reconnect button to re-establish the connection if OBS Studio has been terminated and restarted.
Actions
With Set OBS Scene you can switch the current scene in OBS Studio.
Send OBS Request allows you to execute all commands that are available via OBS Websocket.
On OBS Event allows you to react to events happening in OBS Studio.