Getting Startet with adaptor:ex
Learn in a few steps how to install adaptor:ex and create and start a first level.
Installation
Download adaptor:ex for your operating system and save the file in your Apps folder.
Note
See the Installation chapter if you want to install adaptor:ex with NPM or as a Docker Container instead.
Double-click the application to start it.
When you run adaptor.ex, a command line will automatically start and your default browser will open the adaptor:ex web editor.
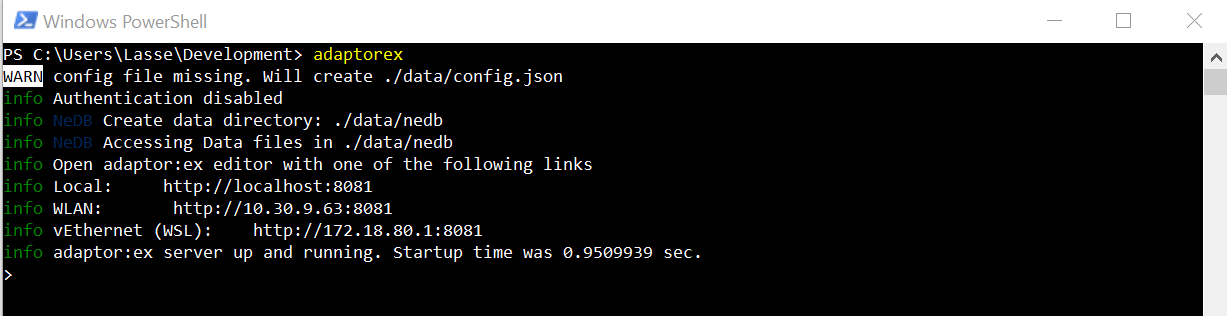
Keep the console open as long as you are working with adaptor:ex. As soon as you close the console adaptor:ex will be closed too.
First steps
If your browser does not start automatically, open it manually and enter the URL http://localhost:8081 in the address bar.

Note
We recommend to use a current version of Google Chrome or Firefox as browser.
The URL may differ depending on the settings you use to run adaptor:ex.
If you have installed adaptor:ex on a server or another machine you have to replace the URL with the IP or domain name of your server.
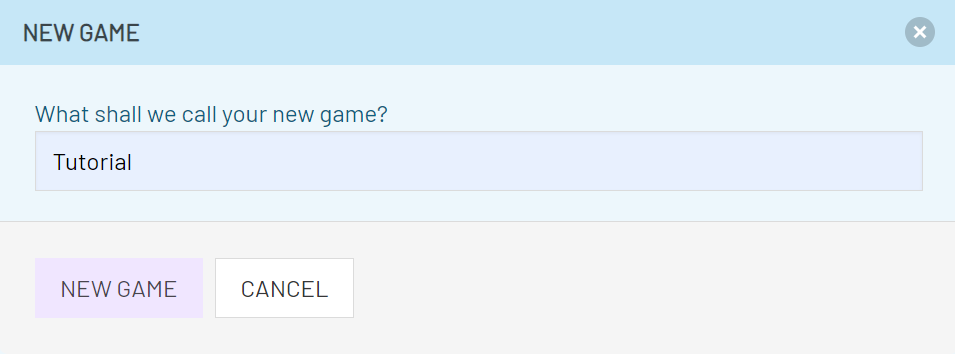
Create a game
Start by creating a new game project. Click on 'New Game' and give your first game a name.
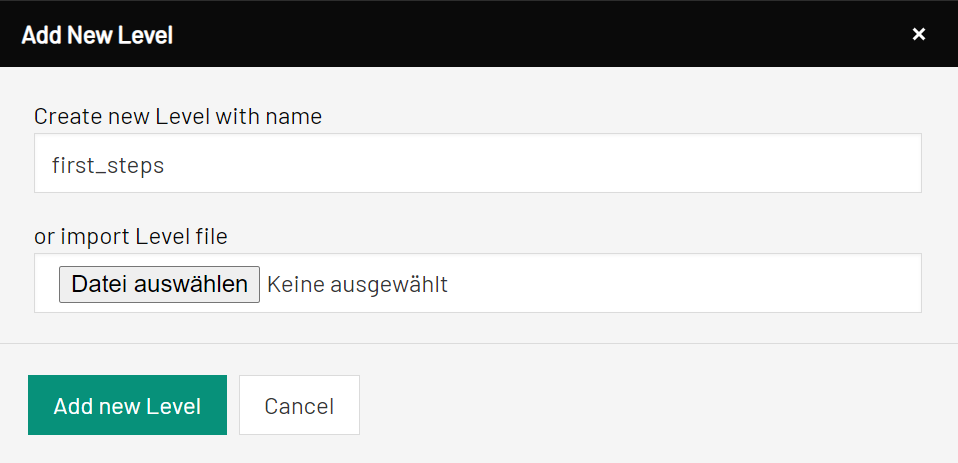
Add a level
When you click on the newly created game project, you will be send to the game overview. It shows all existing levels.Each game can consist of several levels that can be linked together in various ways.
Create your first level with 'Add new'.
Games and levels get their own url path, which is used to access them in the web browser. Because of that, the name must not contain spaces or special characters.
Give the level a name and click on Add new Level.
Edit a level
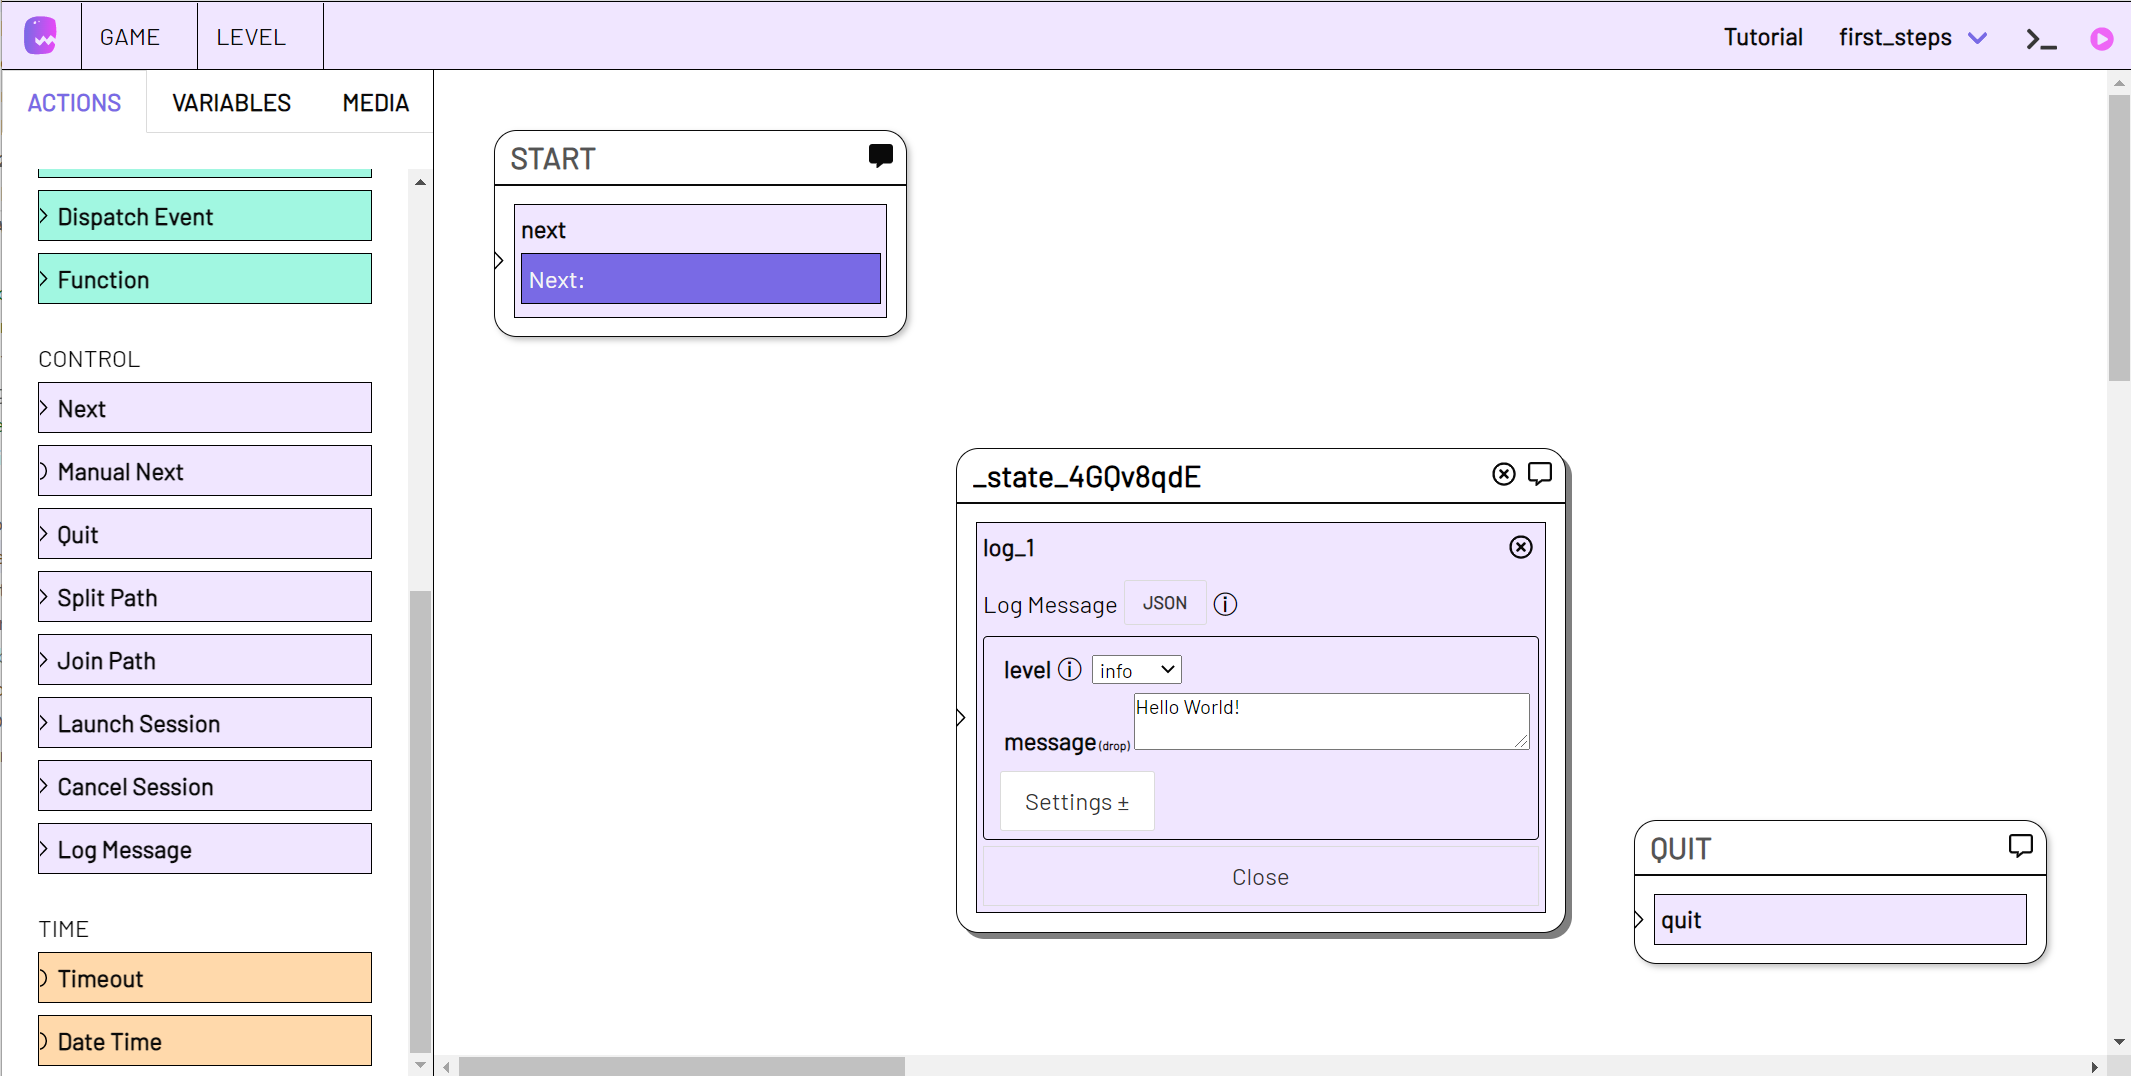
Open the level by clicking on its name. This will open the level editor.
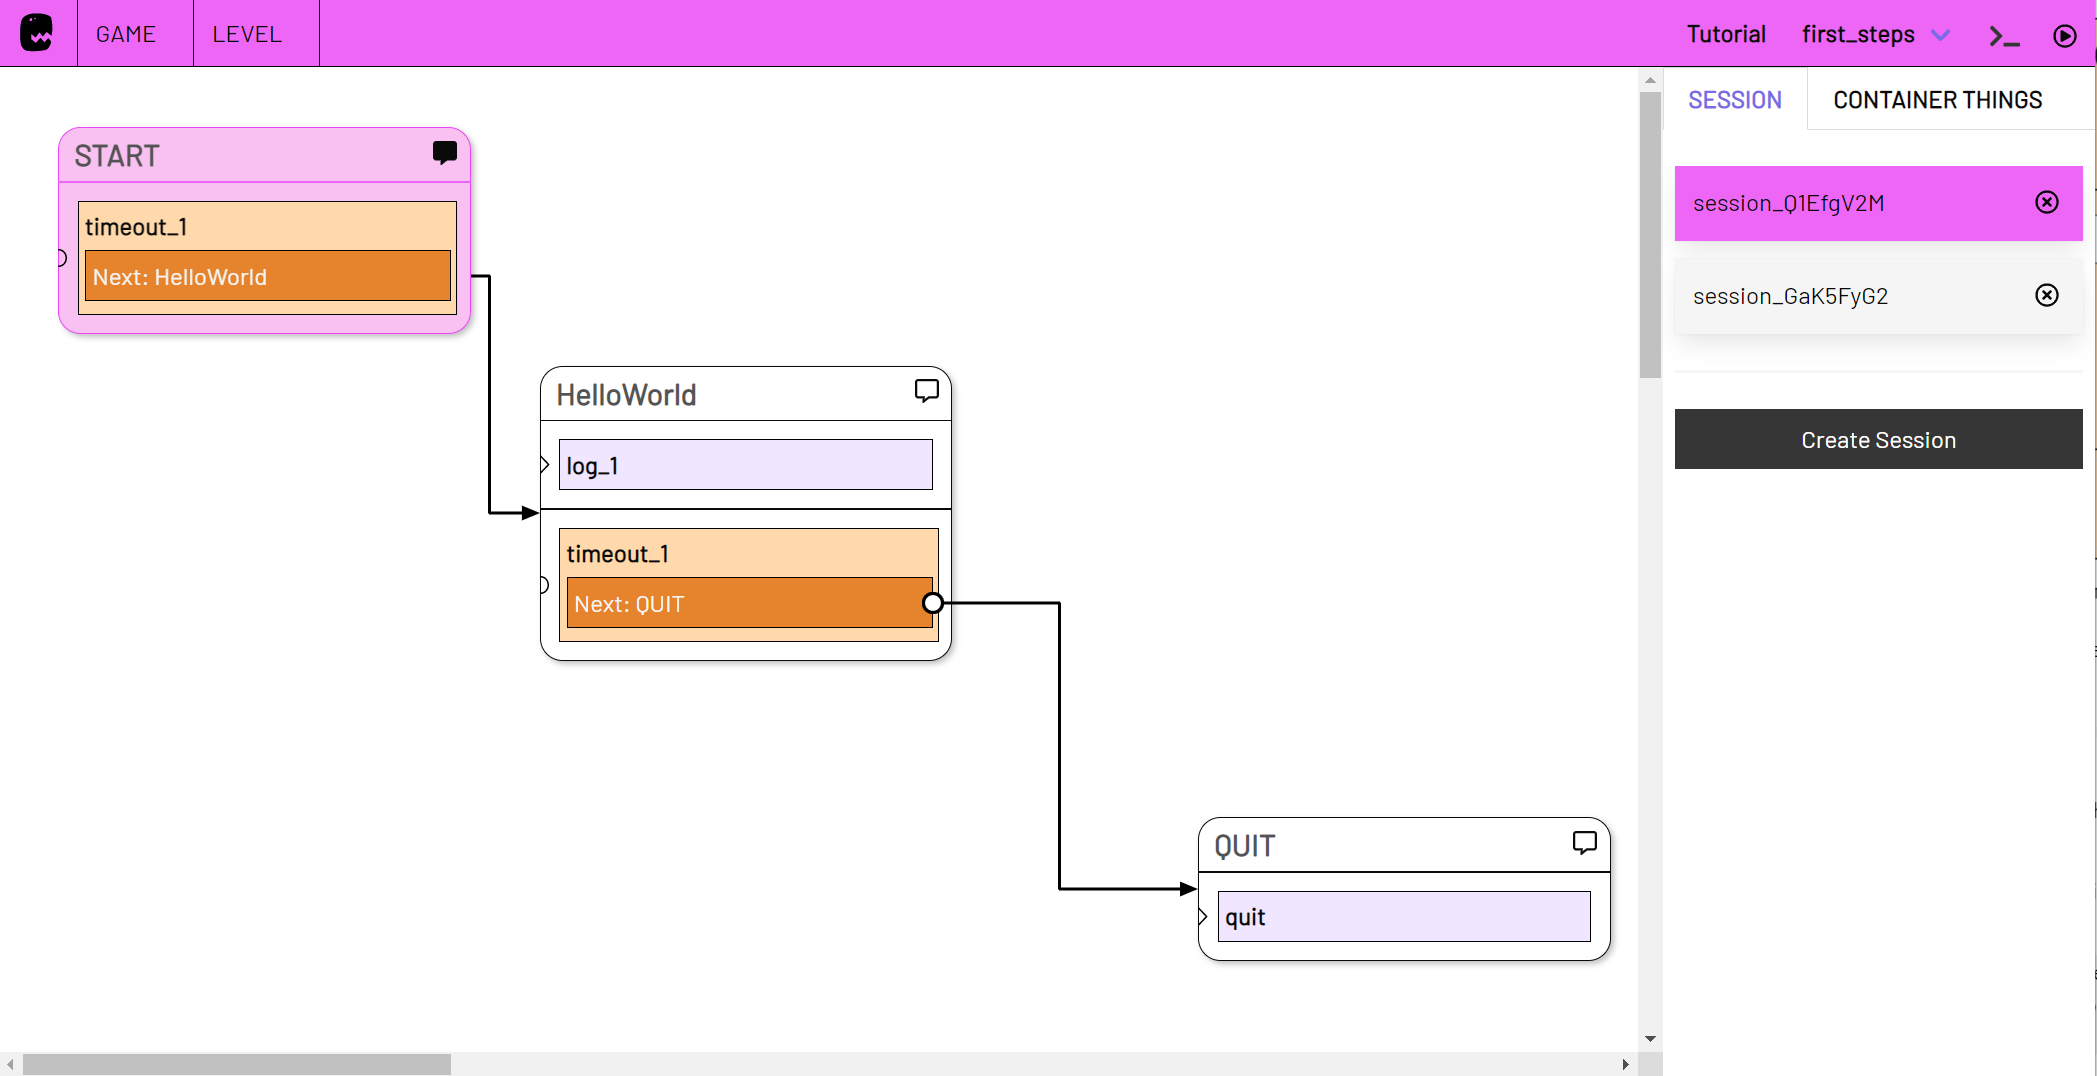
Start (START) and end point (QUIT) of your level already exist.

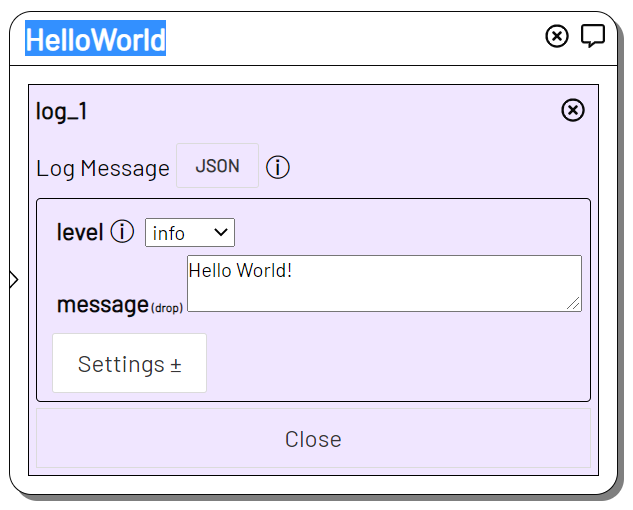
Find the control action Log Message in the left sidebar, listing all possible actions. Drag and drop it on the center of the page.
A new State element is created. It contains a Log Message action (log_1).

Click on the new action to edit it. Write a short text into the message input field and select info in the level dropdown.
To make your level easier to understand, it is a good idea to give all states comprehensive names.
Also state names must not contain spaces, because they can be used in variables.
Click the title bar of your log message state and rename it.
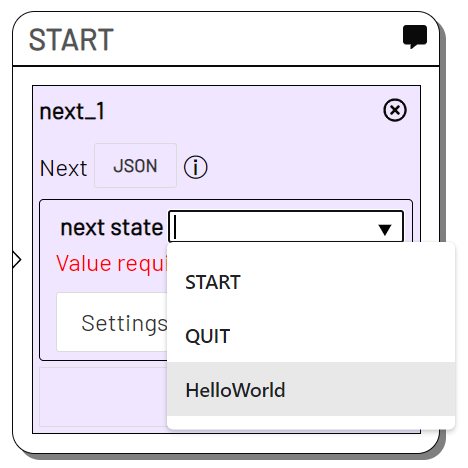
Now edit the Next action next_1 in the START state as well: First click on it. Then select the new state (here HelloWorld) from the next state dropdown to connect it to the START state.
Start a level
Switch from edit mode to live mode by clicking on the play button in the upper right corner

The left sidebar containing the actions will close and a menu opens at the right sidebar.
Click on Create Session in the right sidebar and then on Start Session to create a Session of your level.
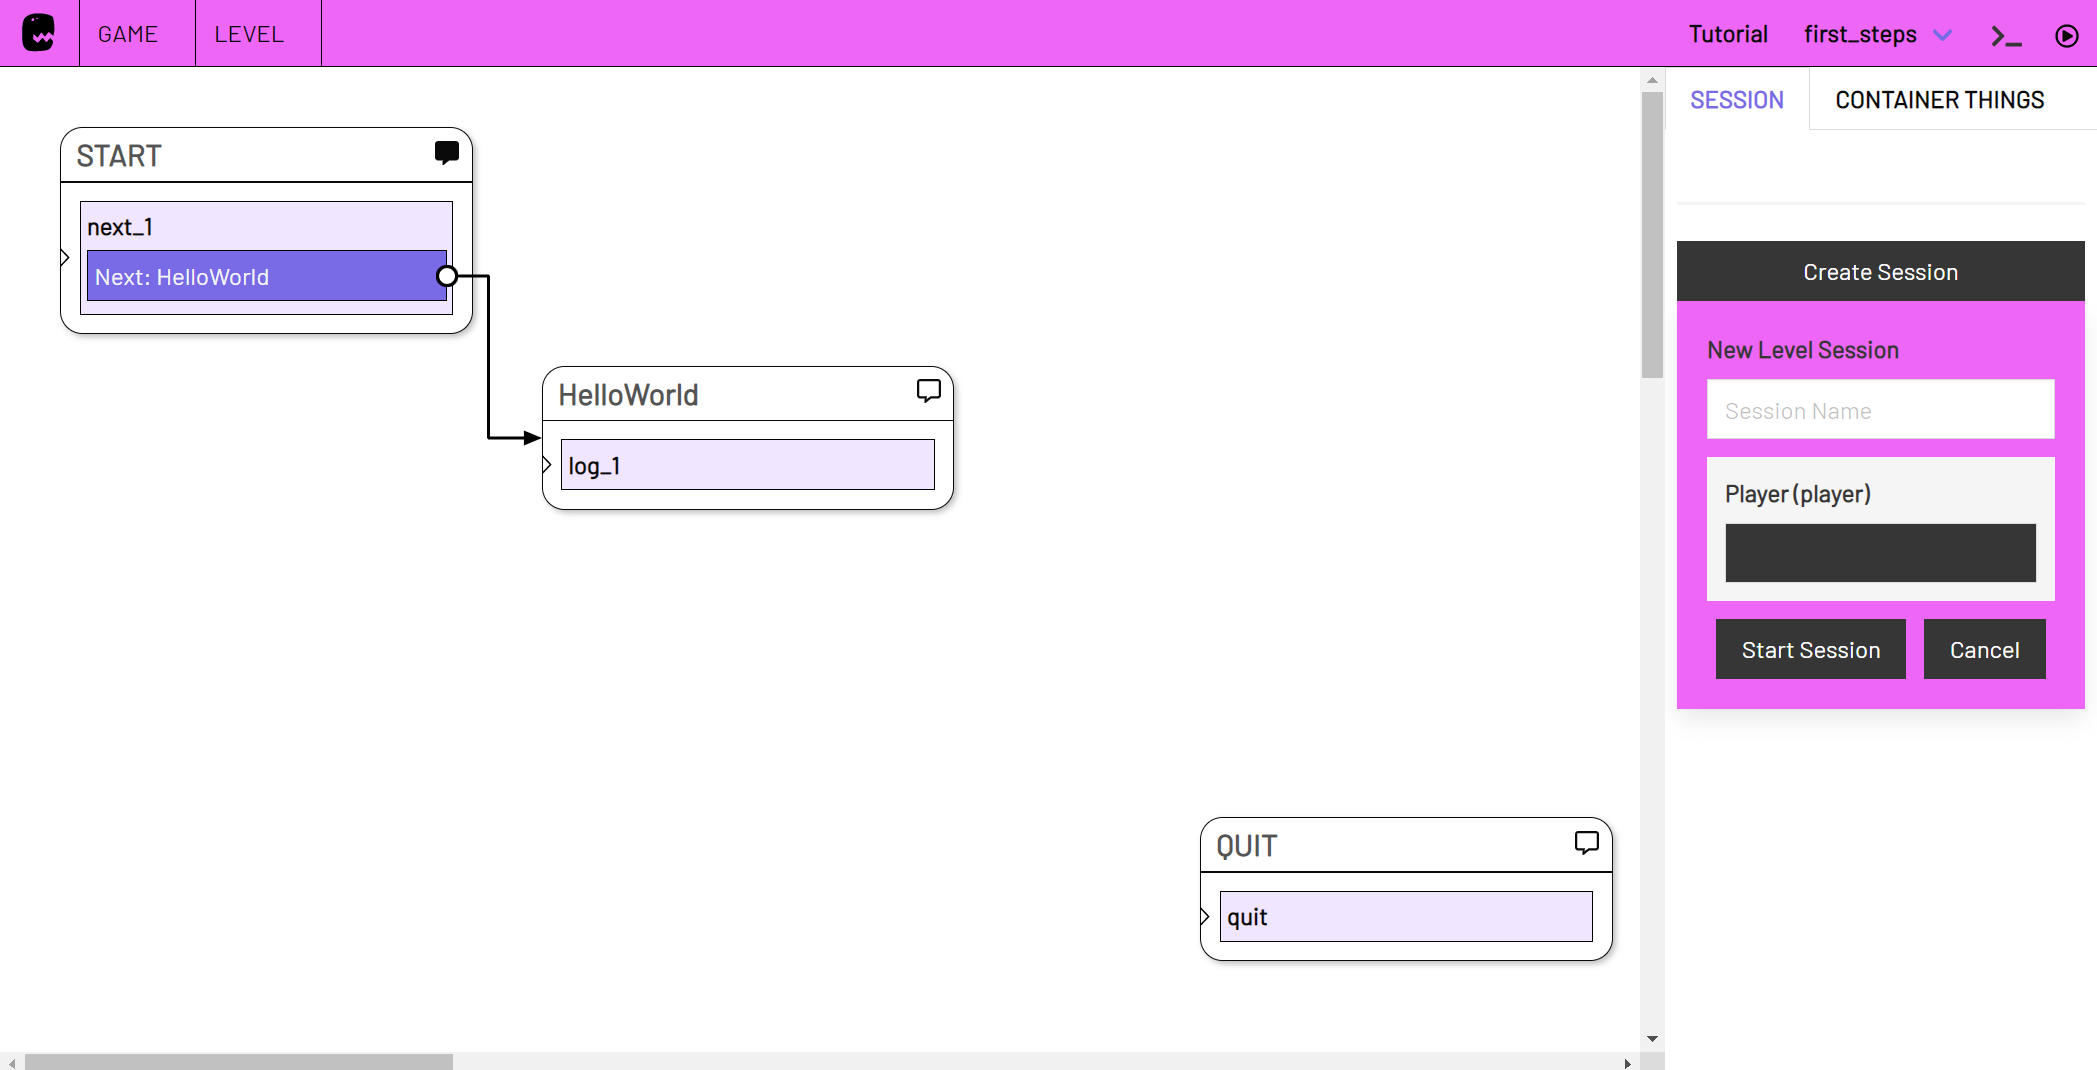
The newly started session is selected in the right sidebar.
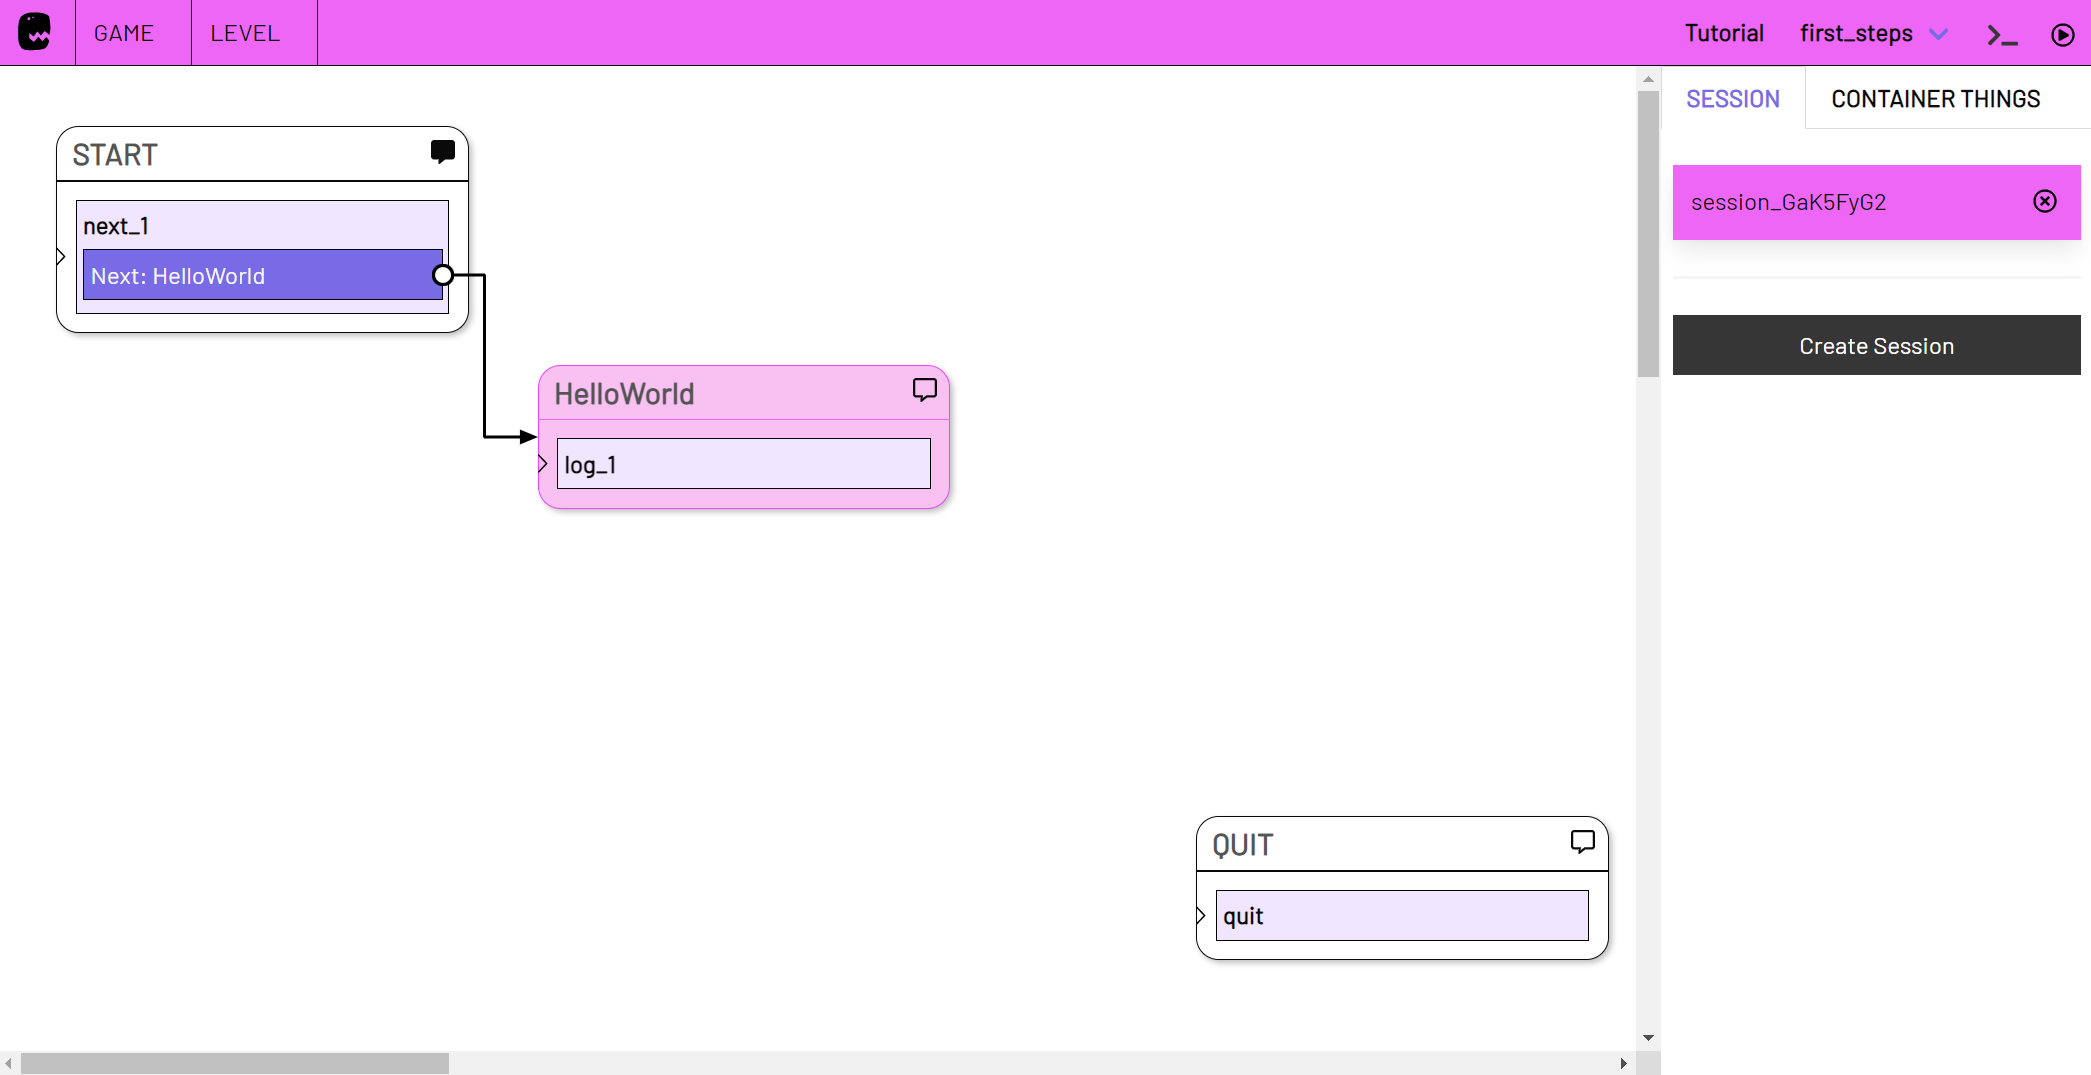
The HelloWorld state is already highlighted.
When we create a new session from a level, the START state is automatically triggered. The next_1 action has continued to our HelloWorld state with the log message right after.
Open the log console by clicking on the cursor icon in the upper right section of the screen.

The latest log message should be 'Hello World!
By clicking on the play icon ![]() of the HelloWorld state, you can manually retrigger it. Watch the log console and see if the message appears!
of the HelloWorld state, you can manually retrigger it. Watch the log console and see if the message appears!
Automate a level
Switch back to edit mode by clicking the Live Toggle button in the top right corner of the menu bar again.
Find the Timeout action in the left sidebar and drag it over the START state.
Dragging the action over the state will highlight the state and indicate that the action is being added to that state instead of creating a new state.
When we add an action to a state that is waiting for something, for example a timer that expires, it automatically replaces any Next action.
Edit the timeout. Enter a small number of seconds in the timeout field and select the HelloWorld state as next state.
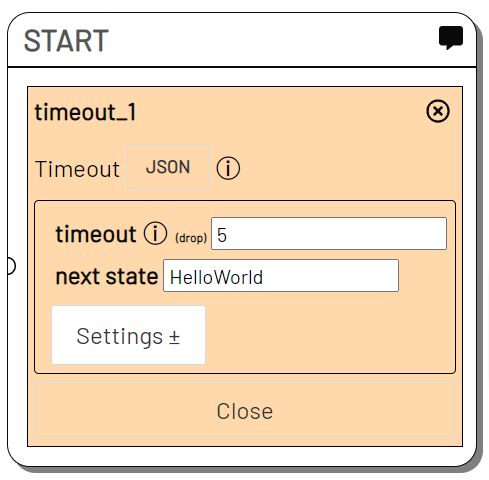
Add a timeout action to the HelloWorld state as well. Edit the timeout and this time select Quit as next state.
If you now switch to live mode and start a new session the states will be triggered in fixed time intervals.
End level sessions
Once the QUIT state is reached, the session is terminated and disappears from the right sidebar.
Your first session will not end automatically. To end it you can close it in the right sidebar (x) or trigger the QUIT state if you have selected the session.
Each session is always based on the latest version of the level. However, if the state a session is in changes, it must be retriggered before changes take hold.
Next steps
In the Glossary you can find out more about the different basic modules, plugins and actions of adaptor:ex.
Tutorials guide you step by step through example projects you can implement with adaptor:ex.
For example, learn how to use the Telegram plugin to create a messenger adventure: Storytelling with Telegram and adaptor eX
Or you can start to control an Arduino with adaptor:ex: Arduino Serial