MQTT
Publish messages and subscribe to topics in a MQTT network. adaptor:ex will connect as a mqtt client to a separate mqtt broker.
MQTT is a popular network protocol used especially for IoT applications.
You need a separate mqtt broker that your adaptor:ex installation can access or you can use one of the public test brokers.
Here you can find out more about the MQTT network protocol: mqtt.org
Setup
Add the MQTT plugin to your game under Game -> Settings and enter the full URL of your MQTT broker.
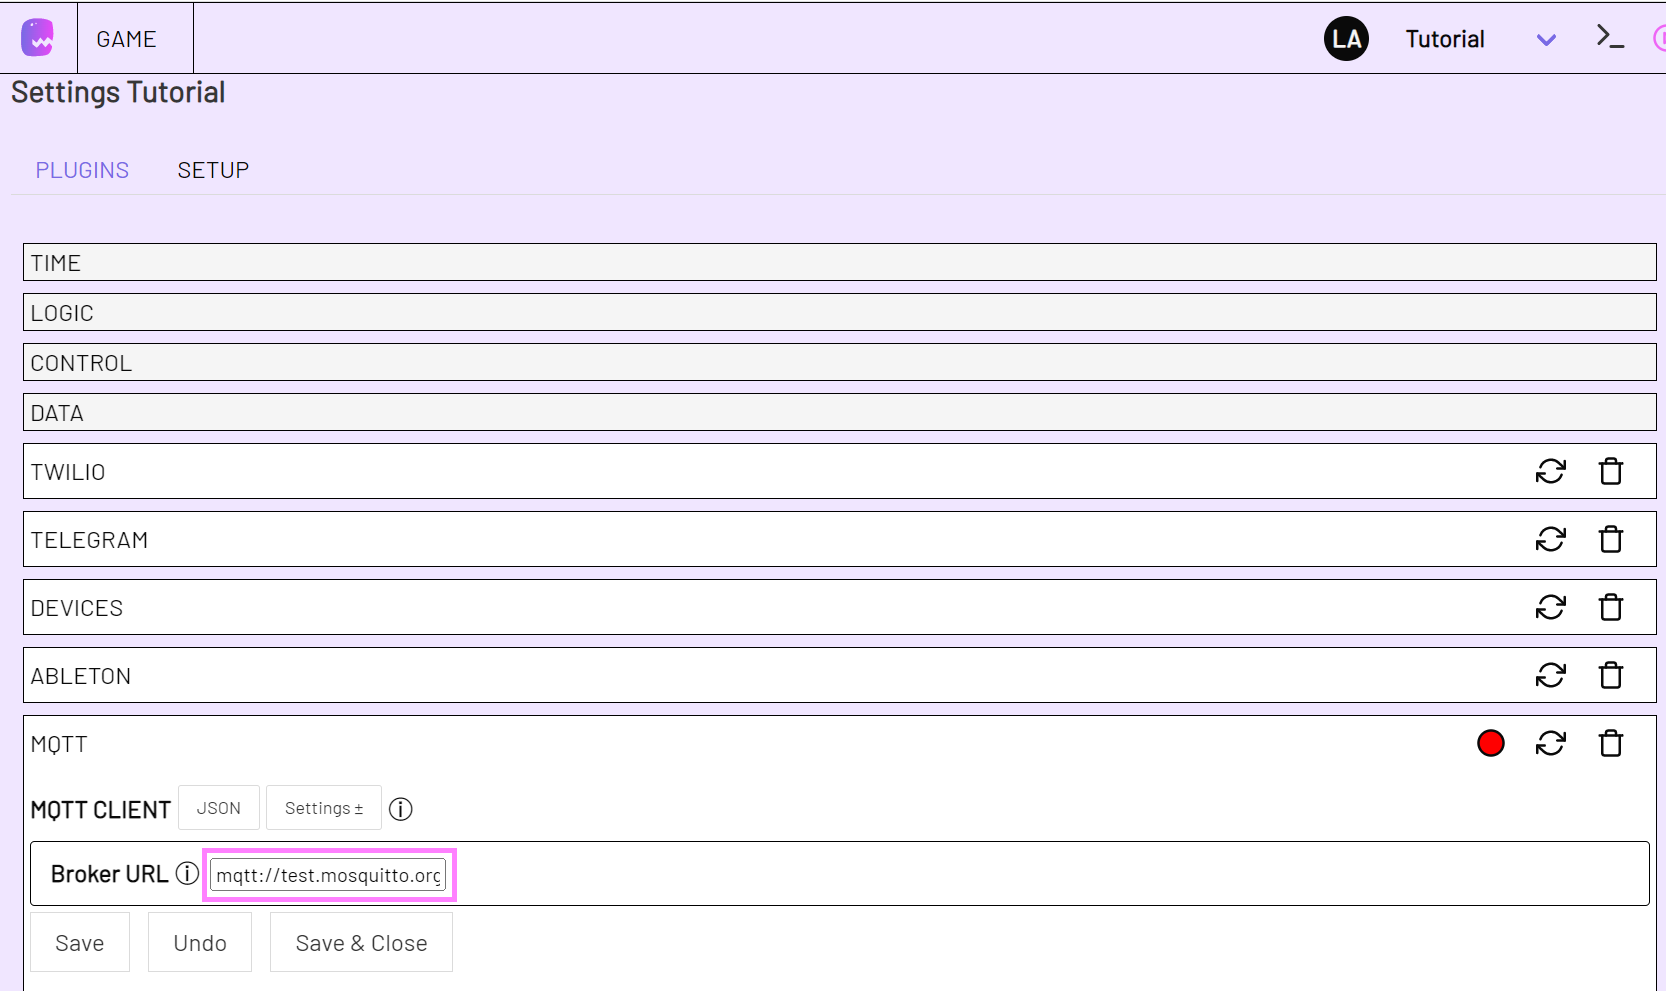
Under 'Settings' you can specify further options for the connection to the broker like username and password.
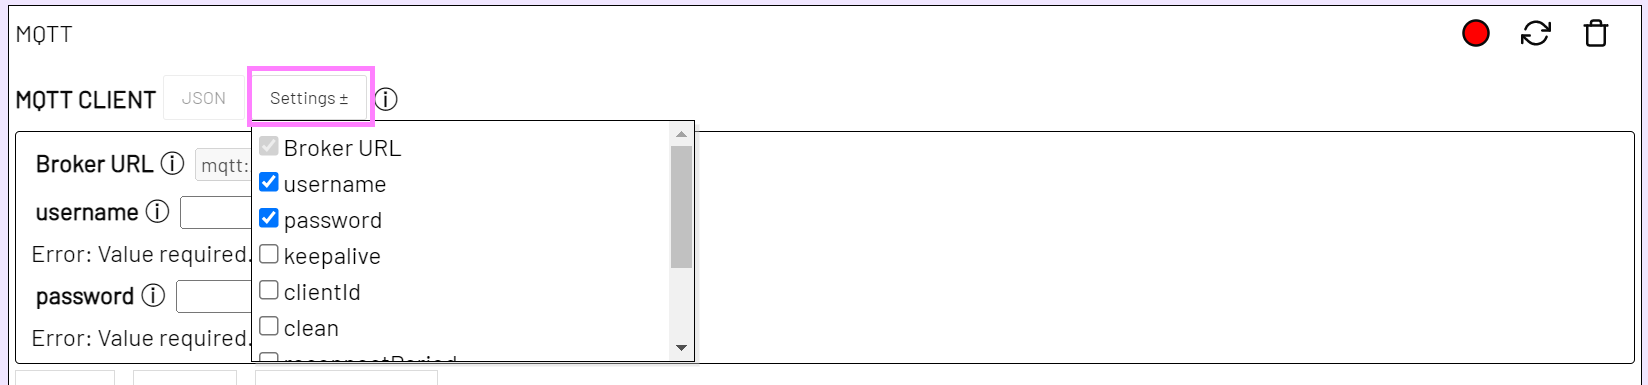
The plugin is based on the NPM module with the same name. Details about optional settings can be found here: https://github.com/mqttjs/MQTT.js#client
Actions
The run action Send MQTT Message allows you to send MQTT messages to all subscribers of a topic.
The listen action On MQTT Message allows you to subscribe to MQTT topics and react on incoming messages on the topic.
Example
Level File: mqtt_example.json
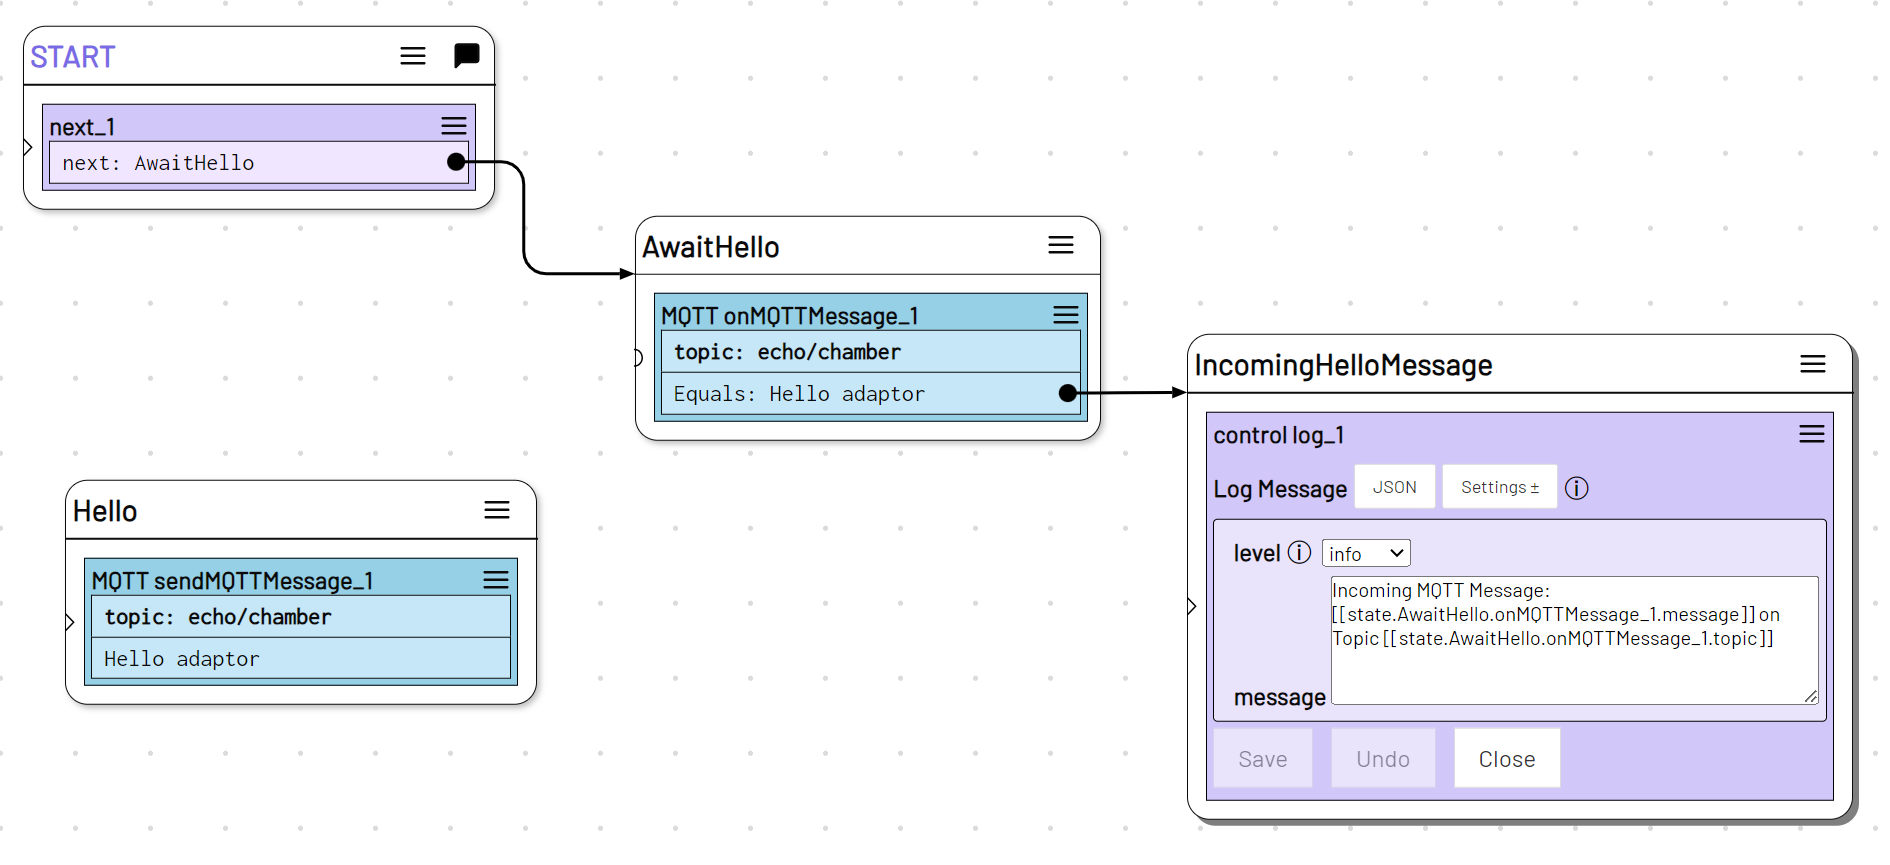
In this example we will send a message with Send MQTT Message which you then catch, among other possible devices in your MQTT network, with On MQTT Message.
Add the MQTT plugin and connect to a broker (Setup).
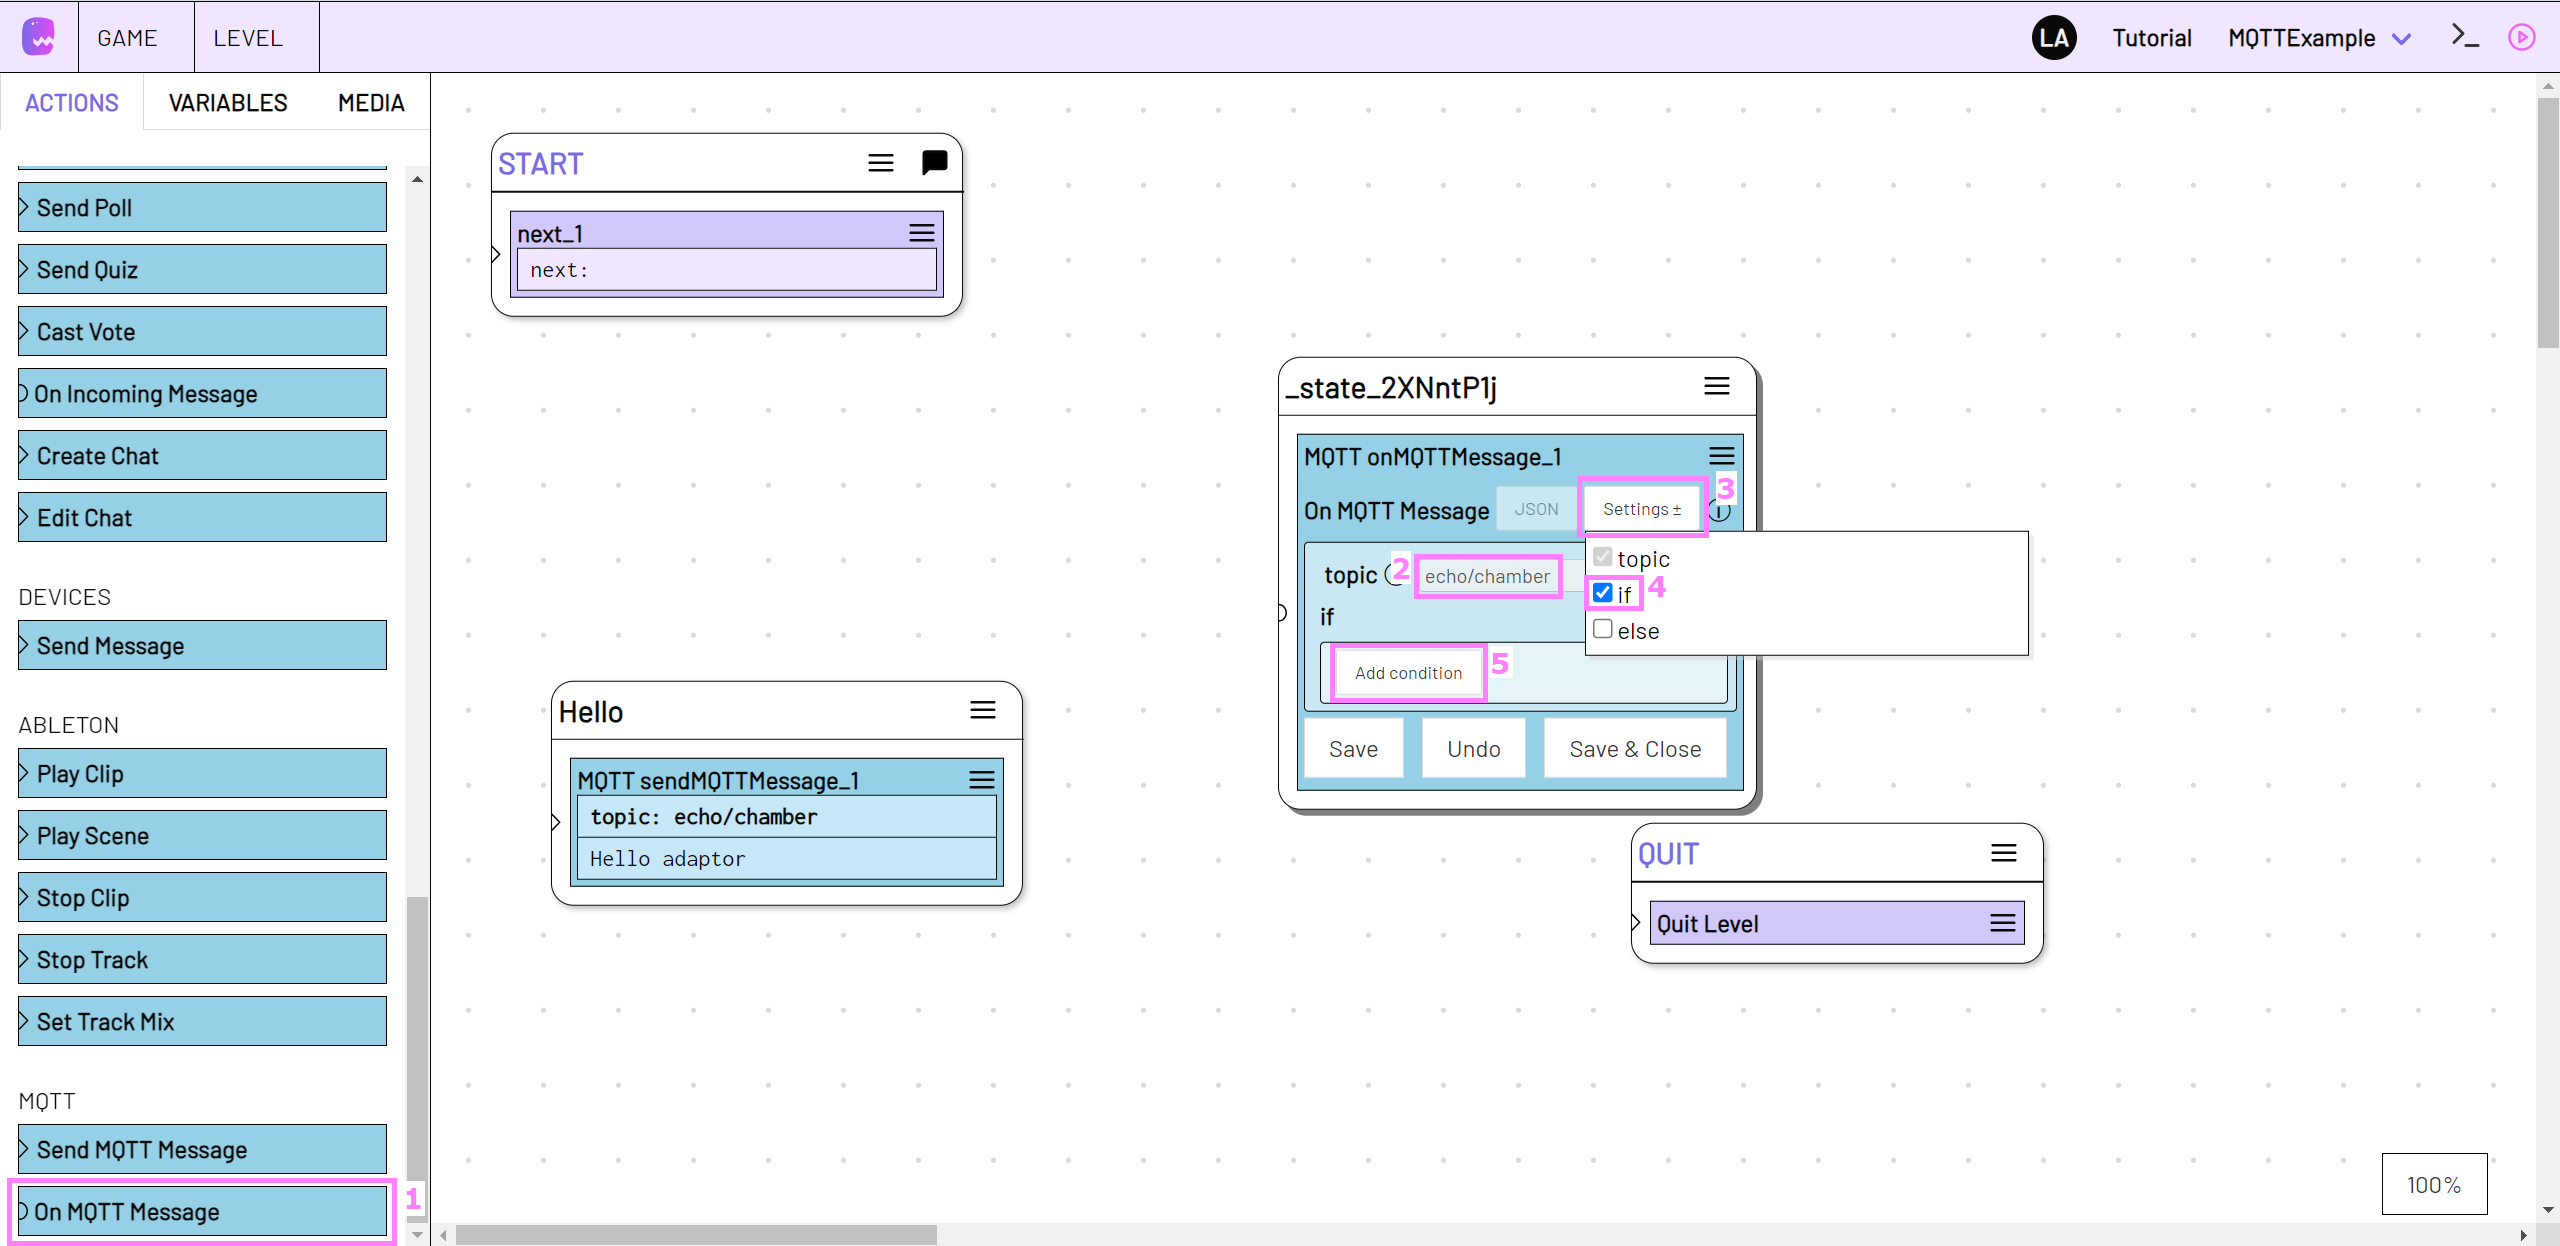
Open a new or existing level in the Level Editor and add a Send MQTT Message action to the STAGE.
Set "echo/chamber" as topic and "Hello adaptor" as message.

Now add an On MQTT Message action to your level (1) and specify the same "echo/chamber" value as above for topic (2).
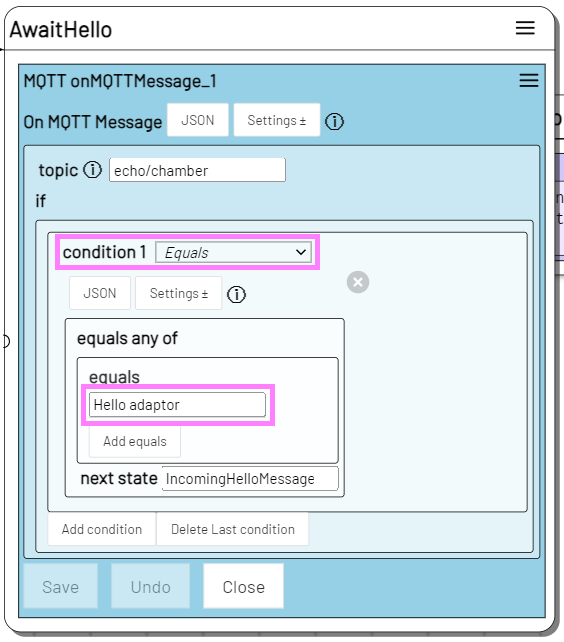
Under Settings (3) select the if option (4) and click on Add condition (5).
We use the equals condition to query whether the incoming MQTT message, on the "echo/chamber" topic, is "Hello adaptor".
To test the example, we create a state that is triggered when the condition matches. With the Log action we can then take an additional look at the incoming message. With the following log message we can display the message and topic of the incoming message in the console:
Incoming MQTT Message: [[state.AwaitHello.onMQTTMessage_1.message]] on Topic [[state.AwaitHello.onMQTTMessage_1.topic]]
We also rename the state with the On MQTT Message and connect it to the START state.
In Live Mode we create a new session. The AwaitHello state is now waiting for incoming MQTT messages. If everything worked and we click the play button on the Hello state, the IncomingHelloMessage state should be triggered directly afterwards.
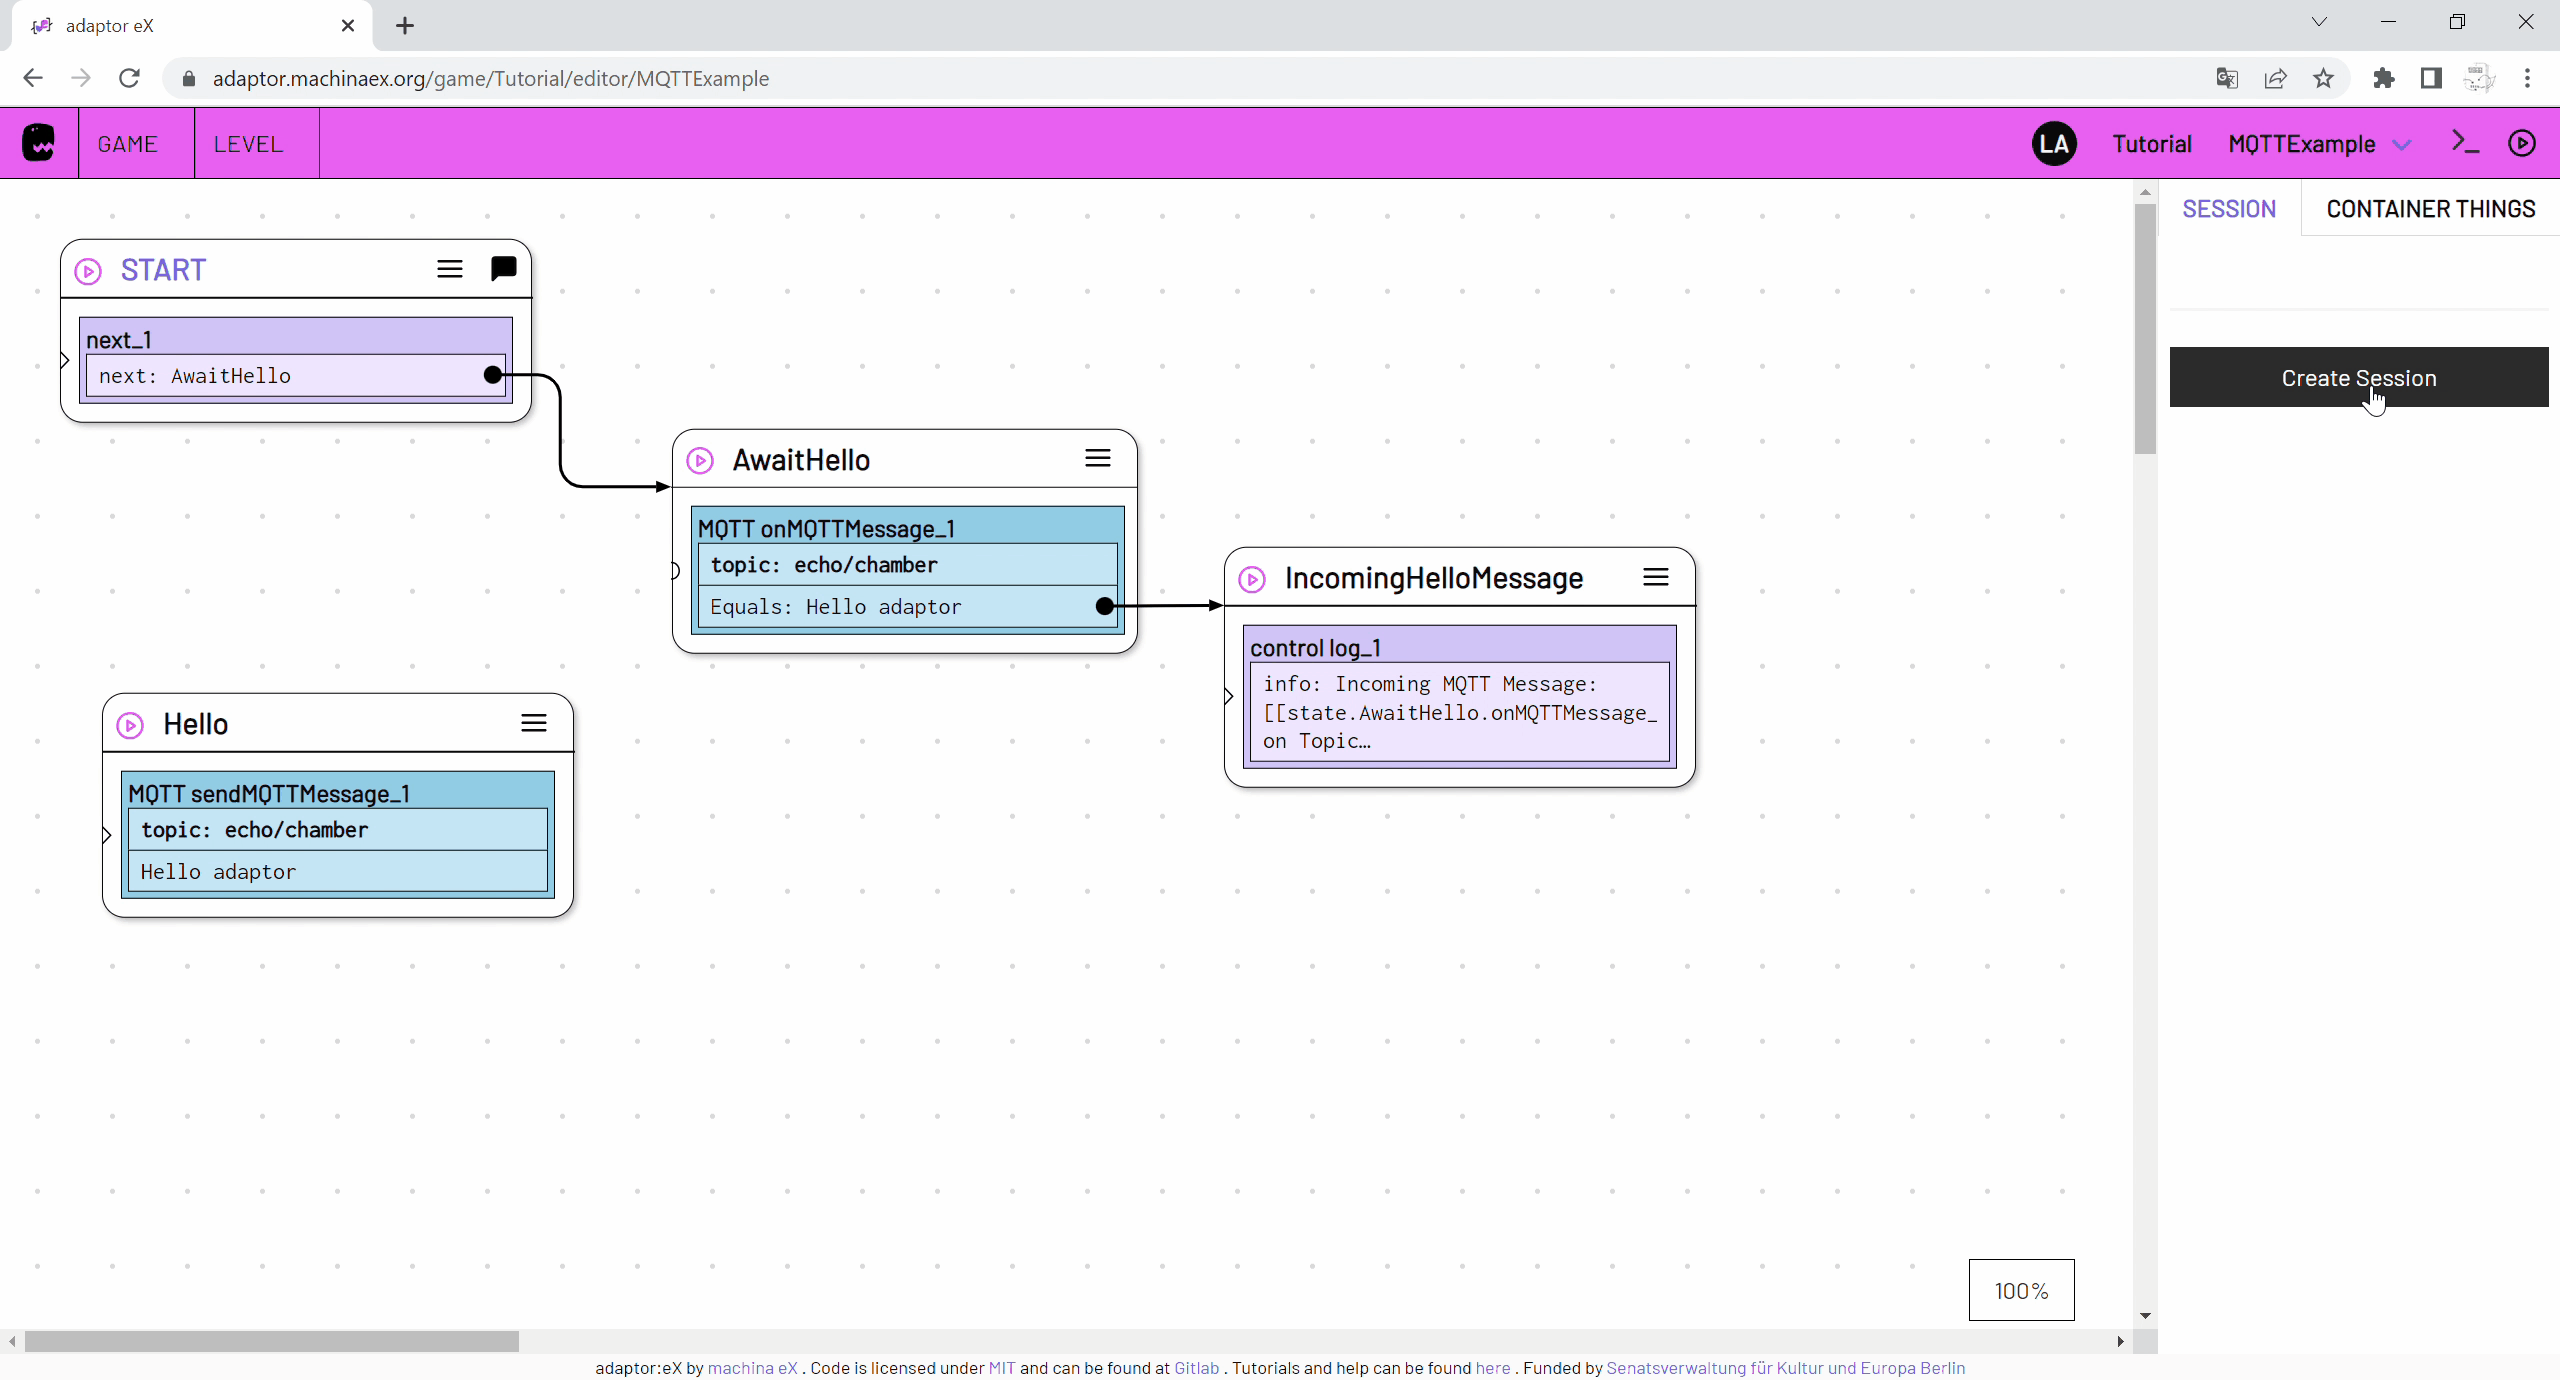
In the Console we can then take a look at the MQTT message that was just received.