The Editor
Each game consists of one or more levels that you edit in the level editor. Here you arrange what happens when and how the elements of your project are related. What you program in the editor can then be played or driven in a Session.
There are two different areas in the Level Editor: the STAGE and the TOOLBAR.
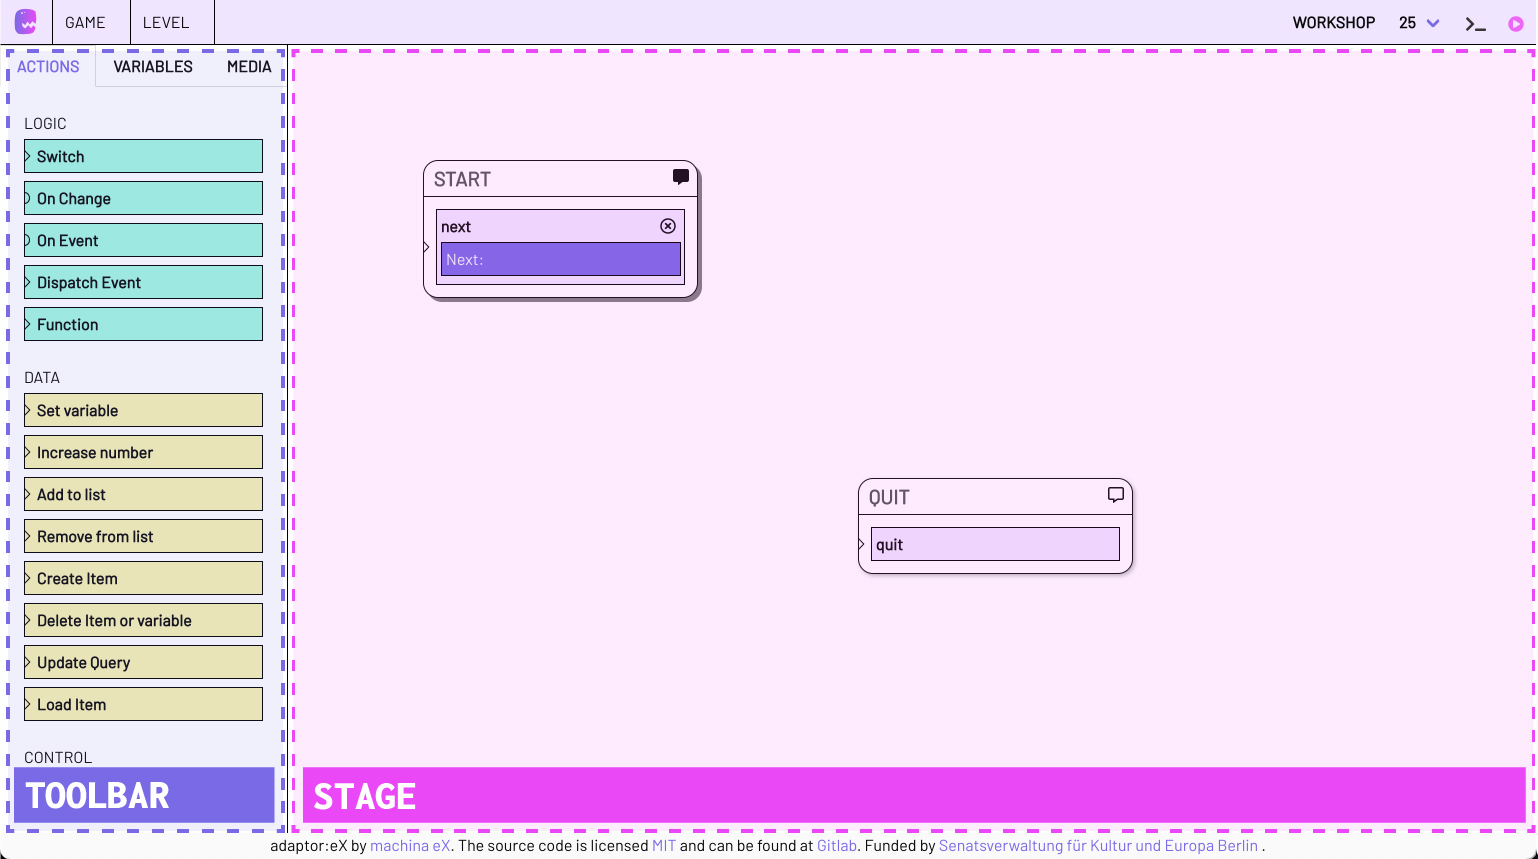
TOOLBAR
Everything you find in the TOOLBAR can be dragged and dropped directly onto the stage.

The TOOLBAR is divided into three tabs:
ACTIONS
Actions ensure that something happens in your level. You can expand the range of available actions by adding plugins to GAME -> settings your game.
VARIABLES
Here you will find data containers whose contents can change over the course of the game. If you want to use a variable within an ACTION, drag and drop it from the TOOLBAR into the corresponding text field. In the ACTION, it is then enclosed in two square brackets [[variable]] and put into the correct form so that adaptor:ex can identify it as a variable.
Variables can themselves contain variables, similar to file folders. If you use a nested variable, you'll see that the levels are separated by periods [[Player.inventory.rope]].
See the chapter on variable data and references to learn more.
FILES
FILES allows you to manage data and media files that you can integrate into your game. If you drag a file onto the form field of an ACTION in which a file is expected, the corresponding file path is pasted there.
See the Data and Media Files chapter for how to manage files and how to add files to your game.
STAGE
The STAGE is the largest area in the Level Editor. You can scroll or click & drag to navigate the STAGE. On the STAGE you organize and link the STATES of your game.
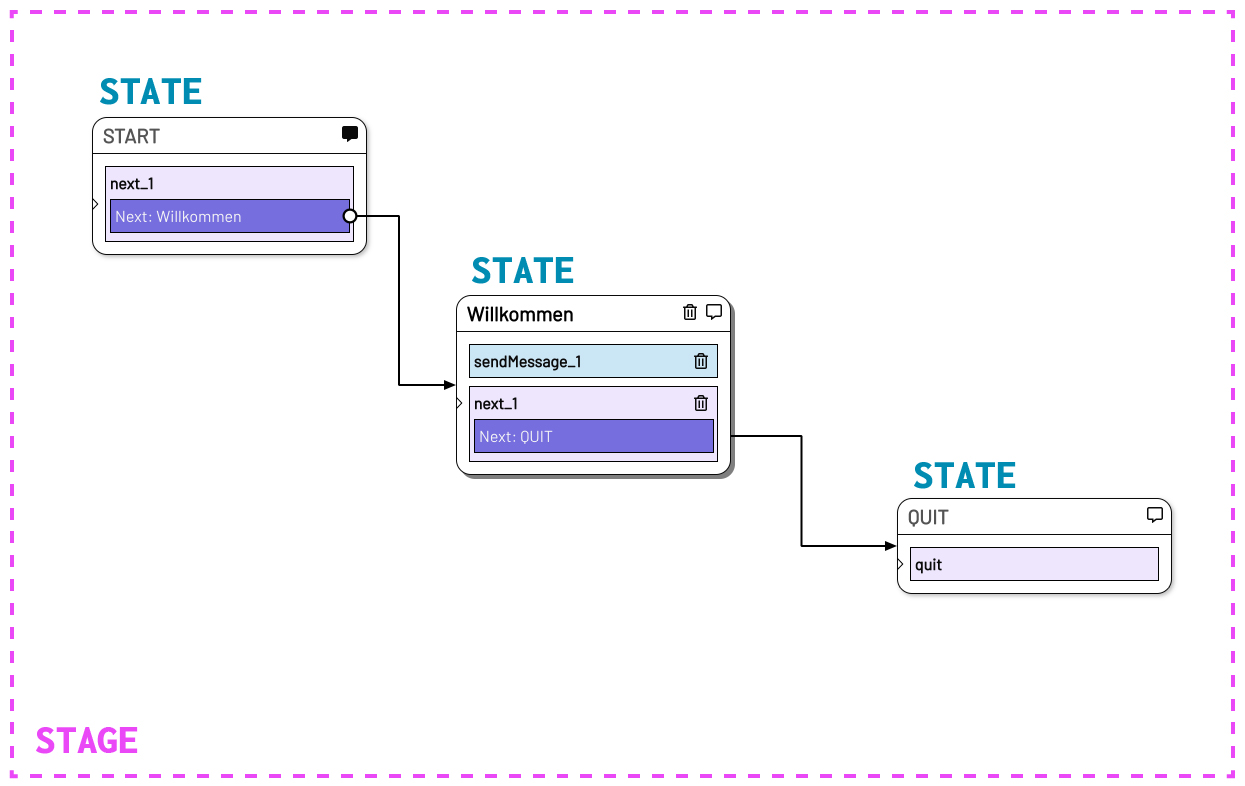
This screenshot shows the STAGE with some STATES linked.
STATE
A STATE is a state your level is in at any given time until it jumps to the next STATE.
In a new level you will already see the two STATES: START and QUIT.
When a new session of a level is started, it automatically switches to the START STATE. You can add any ACTIONS to START or use the Next ACTION to go directly to the next STATE.
You can use the QUIT STATE to end the session automatically. If you switch to the QUIT STATE, the Quit ACTION ensures that the session is ended. It marks the end of your level.
STATES can be moved to the STAGE by drag and drop: simply hover over the header with the mouse pointer, click and then move.
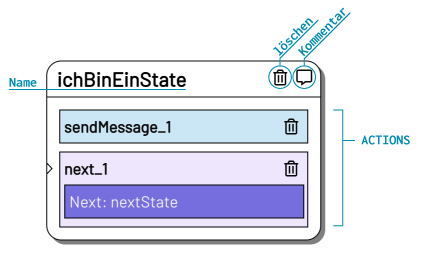
To rename a STATE, click on its name.
You can also comment on a STATE, for example to leave a note for yourself or others. To do this, click on the speech bubble next to the name. A filled speech bubble indicates that a comment has already been written. The comments have no effect on the course of the game.
You can create a new STATE by dragging an ACTION from the TOOLBAR into the STAGE.
You can add any number of ACTIONS to each STATE.
ACTIONS
ACTIONS are the smallest building blocks for each adaptor:ex level. This is where the really important things happen.
In order for something to happen on the stage, we have to drag ACTIONS from the left to the right, from TOOLBAR to STAGE.
You can open an ACTION by clicking on its name. Then you can edit their content. To close the ACTION again, click on the CLOSE button, or on its name again.
Each STATE contains one or more ACTIONS.
Depending on what you and your team are working on, it may make sense to collect several ACTIONS in a STATE, or to create a separate STATE for each ACTION and link them to each other with Next action.
For stage plays, for example, it has been shown that all actions that happen at the same time should also be in the same STATE. This makes it easier to jump between the STATES, for example if sections of the rehearsals are to be repeated. All scenic elements such as light or sound atmosphere are then set for the corresponding scene.
Find out more about the different ACTIONS in the Actions Glossary
ACTIONS are executed sequentially from top to bottom. First, all RUN ACTIONS are executed, then the LISTEN ACTIONS are started.
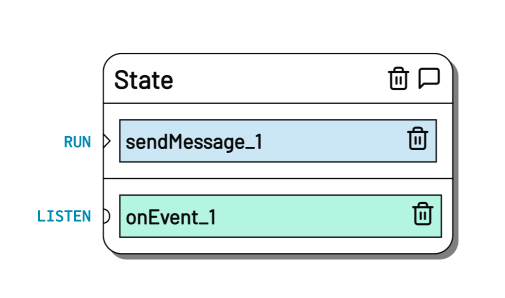
RUN-ACTIONS
You can recognize RUN ACTIONS by the small arrow on the left.
All RUN ACTIONS within a STATE are executed sequentially from top to bottom.
An example of a RUN ACTION is the Set Variable ACTION.
LISTEN-ACTIONS
You can recognize LISTEN ACTIONS by the small semicircle on the left. Some also say it is an ear.
These ACTIONS wait for or "listen" for a specific event. When that happens, move on. They usually contain a condition. When this occurs, the system goes to the specific next state.
An example of a LISTEN ACTION is the On Event ACTION.