Network Devices
In many interactive theater situations, we want to connect external things to adaptor:ex.
If we, for example, want to control an interactive prop like the bomb from the machina eX play '15 000 Gray', we need to send it signals in the HTTP protocol...
In the following step by step tutorial we assume that we want to communicate with a device with HTTP interface, but adaptor:ex of course supports other network protocols (TCP, UDP, UDP/OSC) as well as serial (USB) interfaces (provided we work in adaptor:ex in local mode).
Send HTTP requests
- after we have selected or created our game, we choose Game > Settings
-
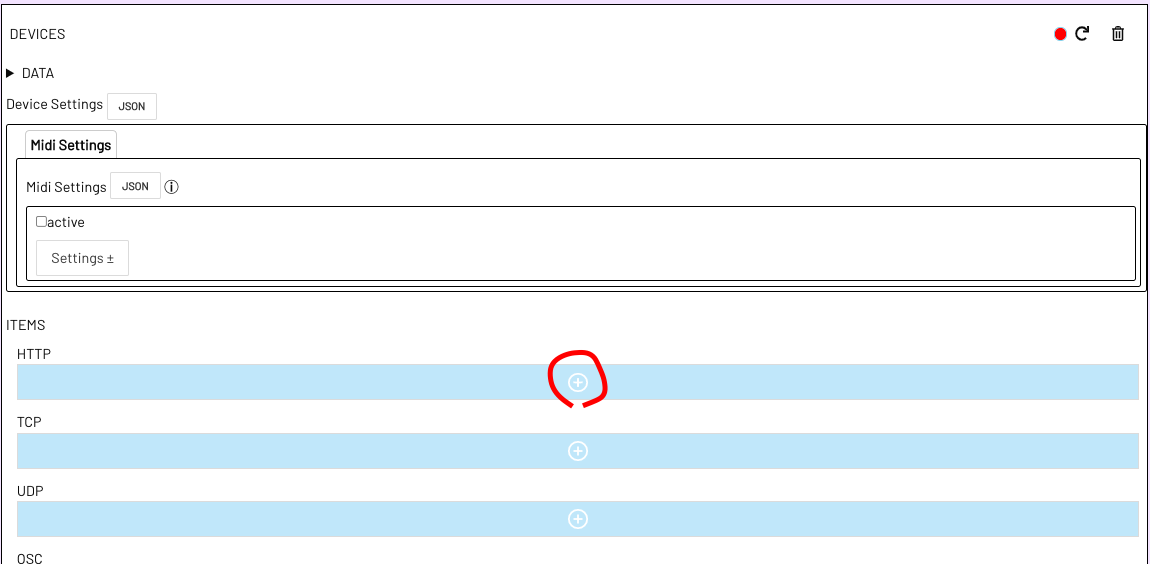
in Settings click on Devices and under HTTP click on the Plus button to create a new HTTP device.
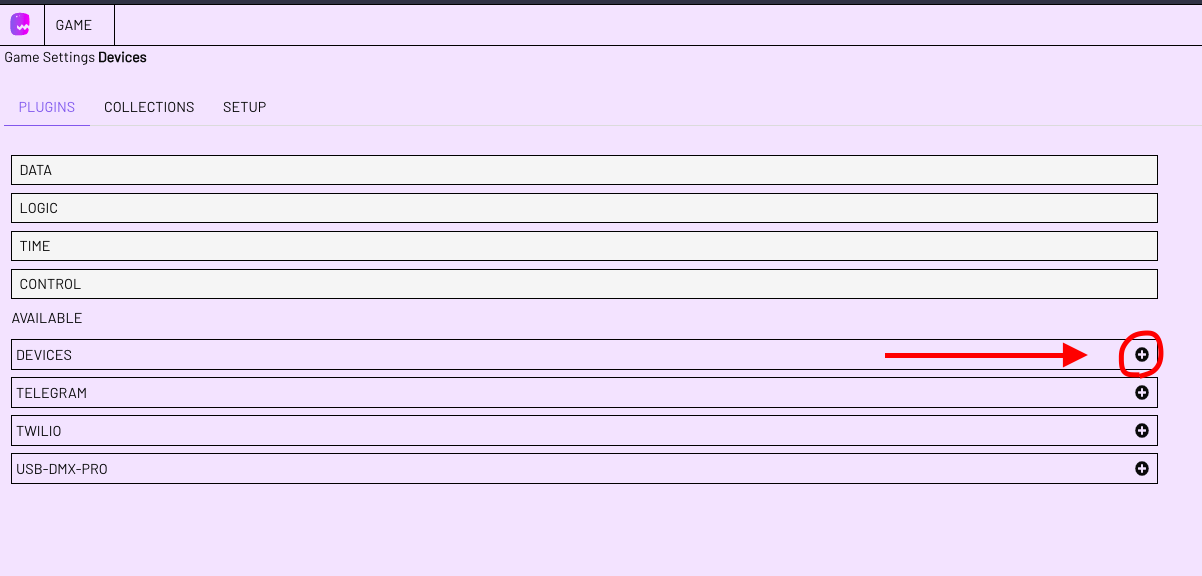
Devices exist on the game level, i.e. one and the same device can be reached from any level within a game.
-
The new device gets a name. In our example we simply call it "Bomb".
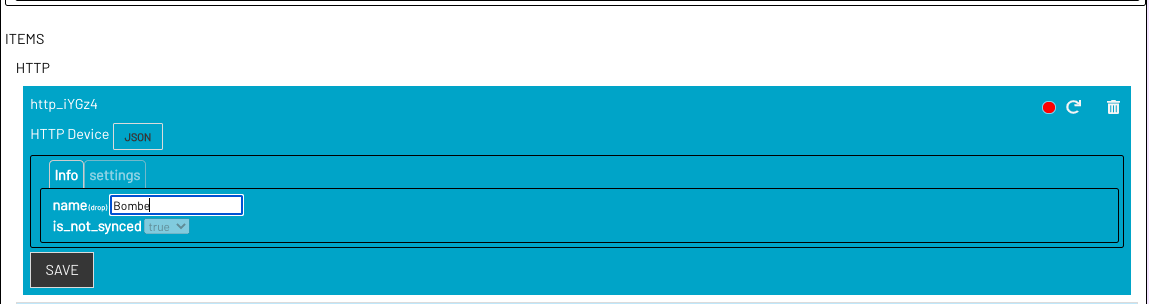
Under this name it will be available in the level editor, both as a device and as an event source (more about this later).
-
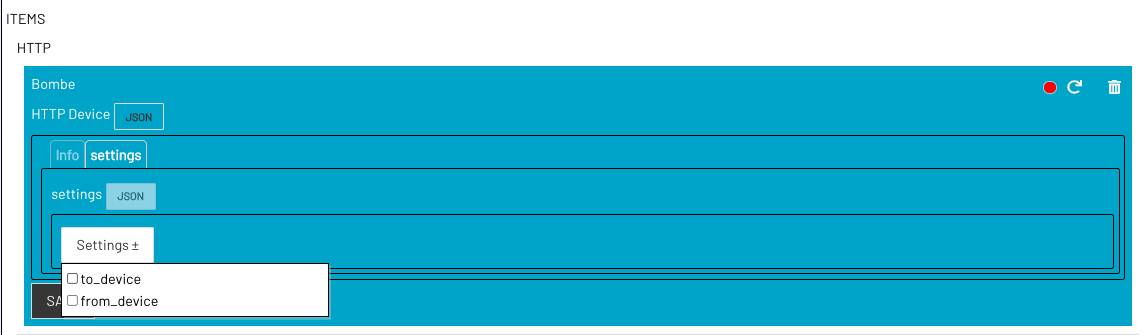
under Settings we select "to Device", because we want to send something to the device bomb.
-
There is potentially more to set here. But we'll keep it simple for now and just fill in the URL field. This is the URL (e.g.
http://192.168.178.4:3000) of the bomb on our network.Then we click SAVE.

Because we can reach the bomb in our internal network via WLAN, the URL in our case is
http://plus the IP address of the bomb plus:3000because our bomb listens on port 3000. But of course the bomb could also be a device behind a domain (e.g. if it would be accessed via an internet service or otherwise DNS resolution takes place).
-
Now we create a level or change to the level from which we want to address our bomb (GAME > OVERVIEW > Select or create LEVEL).
-
In the Level Editor we now find on the left in the Action Bar, the area "DEVICES" and the action "Send Message".
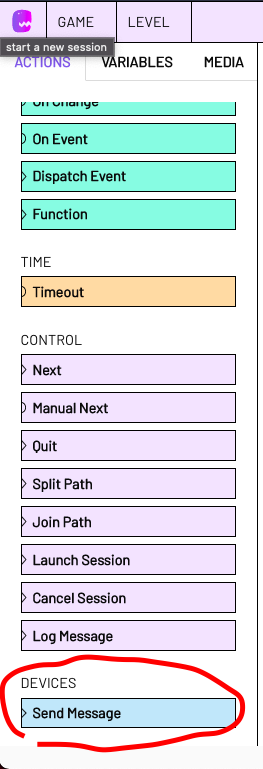
-
We drag the Send Message Action onto our stage to create a new state with the Send Message Action.
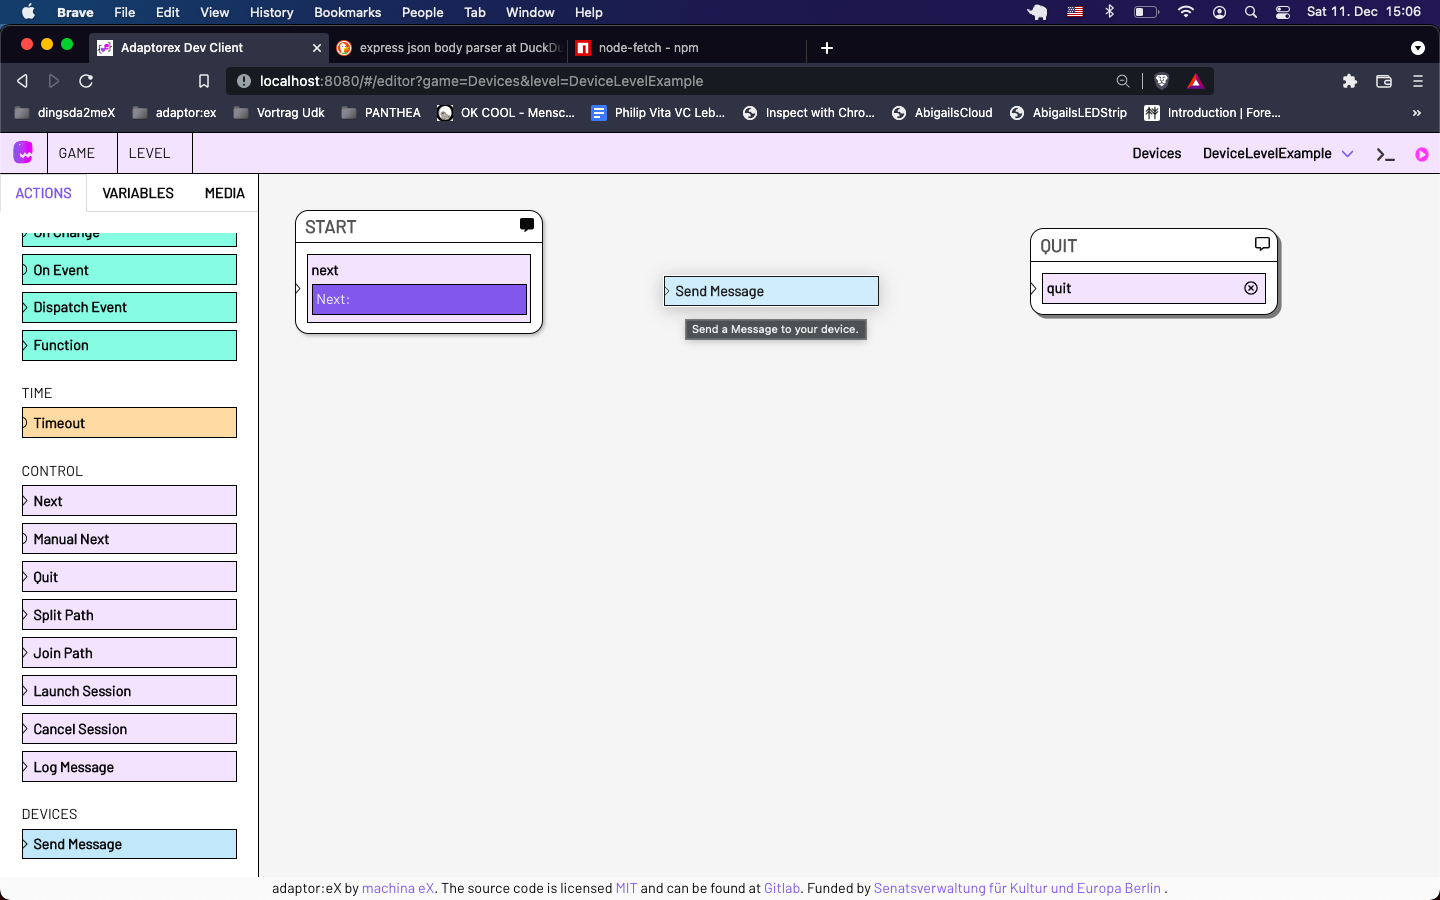
-
We rename the state (e.g. to TRIGGER_BOMB because we want to start the bomb) and select the device "Bomb" under "to" in the action form, if it is not already selected.
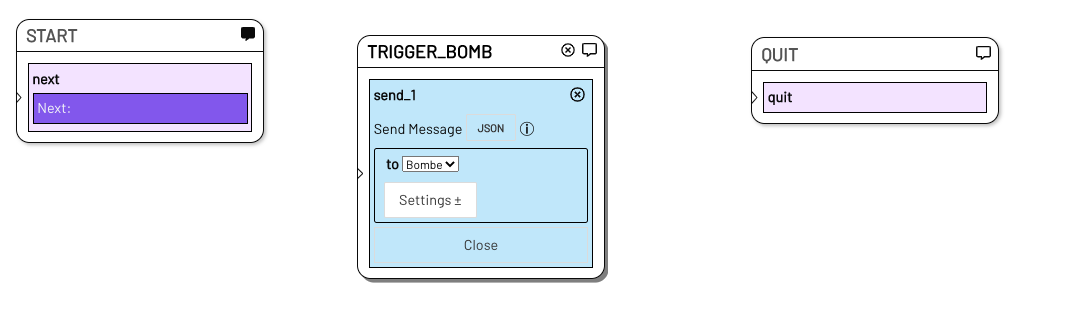
-
We know from the documentation of our bomb requisite that the bomb can be started with a GET request to the endpoint/path
/AN.So let's look at Settings to see what other fields we could select in the Send Message Action:
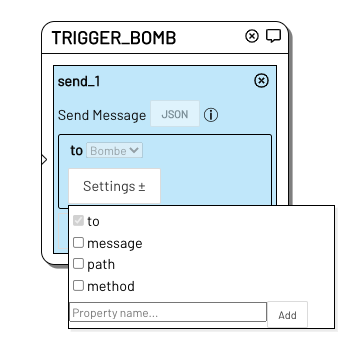
messageis the message we want to send to the device. The message is sent in the HTTP request as a so-called query parameter. We do not need this in the case of the bomb, but it is good to know.method` determines which HTTP method will be used. If we don't specify anything here (and nothing else is set in the settings), an HTTP GET request will be sent. Because our bomb only listens to GET requests, we don't need this here. But also good to know.
path
is the path to which the HTTP request is sent. Aha! The bomb is started with a message to/AN. So we selectpathand write/AN` in it.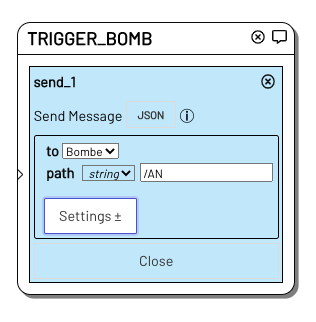
So the send message action, when we arrive in this state in the level, sends an HTTP GET request to the url of the bomb (
http://192.168.178.4:3000as we determined in Step 5.) and also appends the path/ANto the url (so our message goes tohttp://192.168.178.4:3000/ANin our example)
-
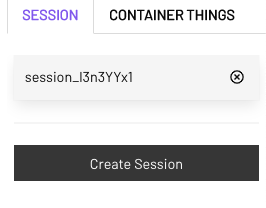
So we connect our new state (of course add another NEXT action, etc.), click on the LIVE MODE button in the upper right and start a session.
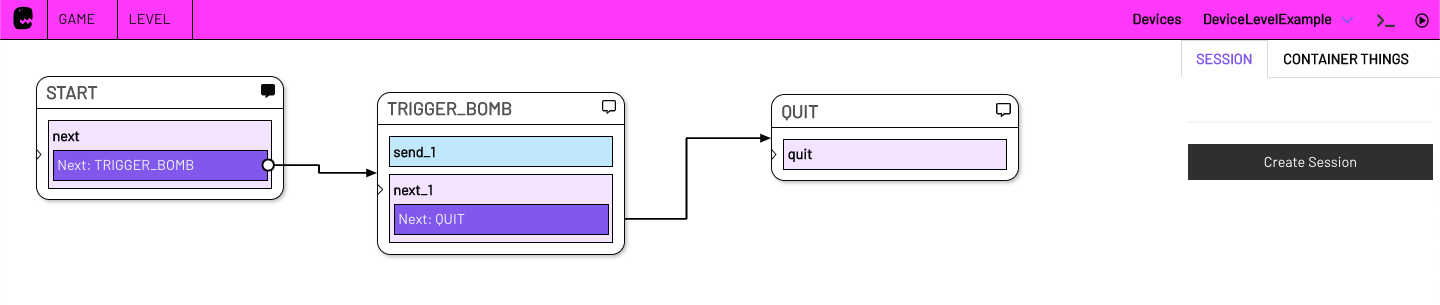
Once the session arrives at our state
TRIGGER_BOMB, our send message action is activated and we send an HTTP GET request to our bomb and start it.Yikes, it's ticking! Now hurry up!!!
Perfect. So now we know how to create a new device and send it HTTP requests! Excellent!
But what if we have a device that should send HTTP requests to our adaptor:ex server/computer?
Receiving HTTP Requests - with Webhooks
Our example prop, the time bomb from 15'000 Gray, sends an HTTP GET REQUEST to the IP address of the computer running adaptor:ex in case its timer has expired (Boom!) as well as in case it has been successfully defused by the audience (Phew!).
In order for adaptor:ex to respond to these messages, we need to go back to the Game Settings:
-
There we select the Settings button of the device bomb and see that besides to_device there is also
from-device. We select this.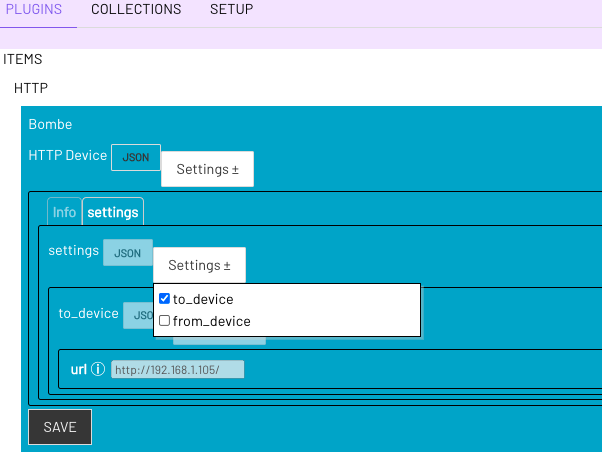
-
Because we expect GET requests from the bomb, we don't change anything, but click SAVE once and then click the reload button on the top right (the circle icon)


After a short reload, the indicator should now light up green and we see a URL in the
webhookfield. Our bomb should now send its signals to this URL. -
So we configure our bomb (or any other device) to send to our webhook address. In our example the bomb now sends a HTTP GET request with the query parameter
?timeout=trueif it explodes or?solved=trueif it is defused.So now we want to respond to these two events.
-
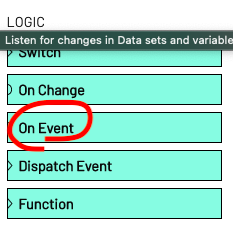
We switch back to the level editor and drag an 'ON EVENT' ACTION onto the stage.
-
Under Settings we add the
fromoption and select the http deviceBombein the drop down menu underSelect Source. Aseventwe specify "incomingMessage". So we want something to happen when an incomingMessage event occurs at the network device Bombe. -
For simplicity we first select the
elseoption in the Settings and now link this listener action withQUIT.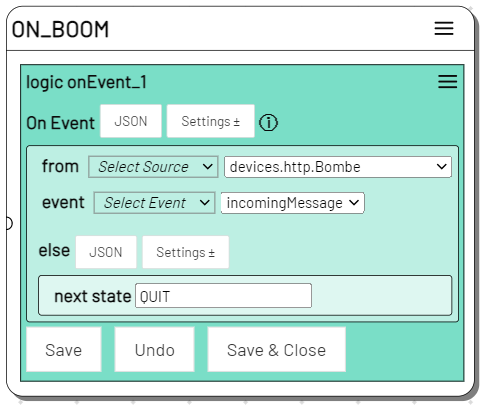
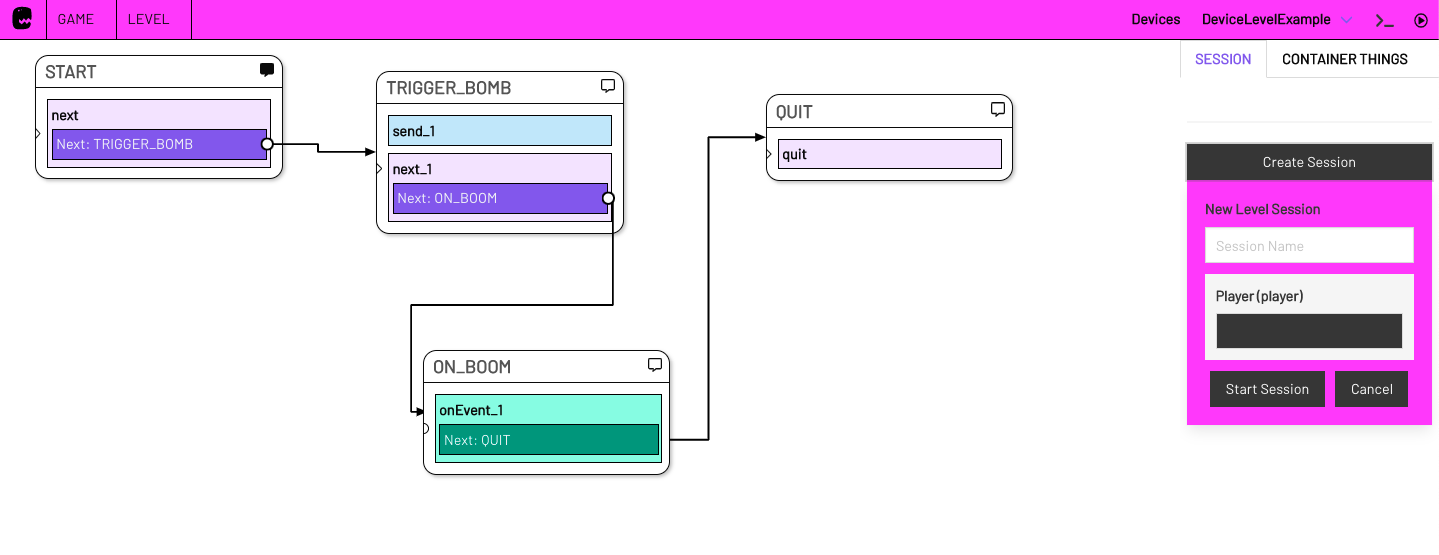
-
So now when the bomb sends an HTTP GET request to its
webhook, the event is triggered and we arrive at the end of the level.
Filter incoming HTTP REQUESTS
But how do we now distinguish between a request with ?timeout=true and one with ?solved=true?
-
Instead of
elseas in step 5. we selectifin the action Settings. The url queries fall directly into the event. So we can look at the individual queries (timeoutandsolved) directly from adaptor:ex and check them to determine which state may be triggered in which case.So we add a condition (
add condition) and enter in the fieldfieldwhich query adaptor:ex should look for (timeoutorsolved) and which value this query parameter must have for something to happen (truein our example).Finally, in
next statewe enter the name of the state that should occur if this is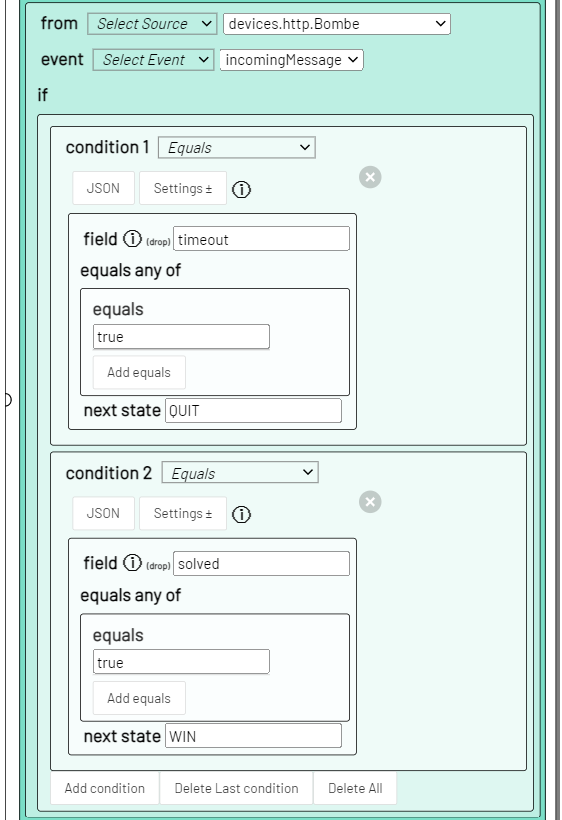
After we have created a WIN State (which could later, for example, play the victory music or control the light etc.), the level now looks something like this:
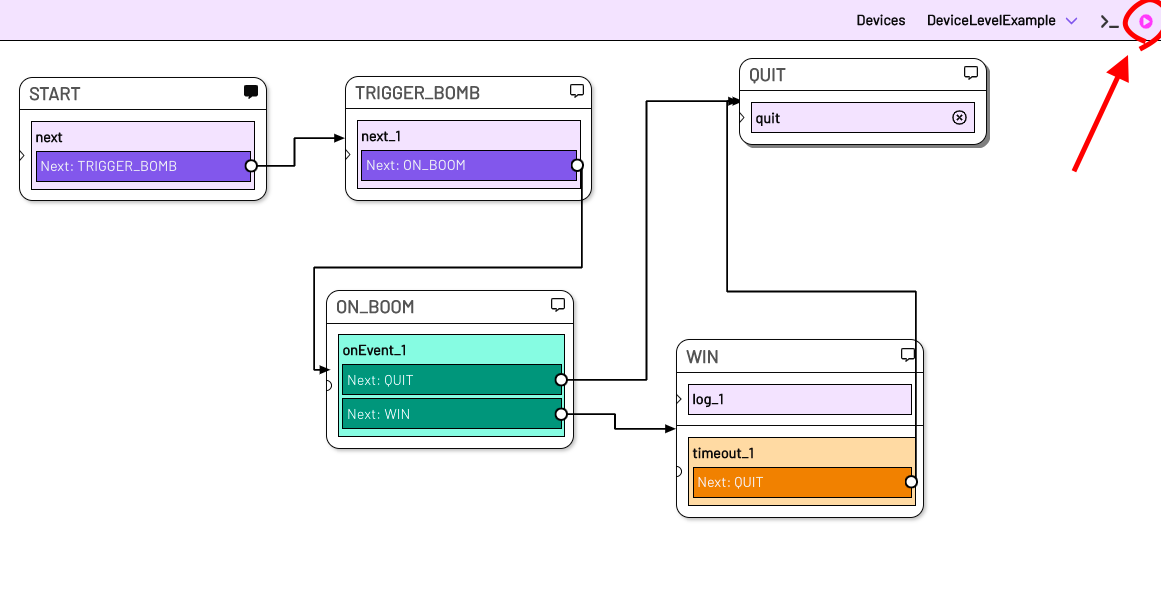
And if we switch to live mode and start a new session and then mark it, we see: The session stops at the state
ON_BOOMand waits for the events we defined.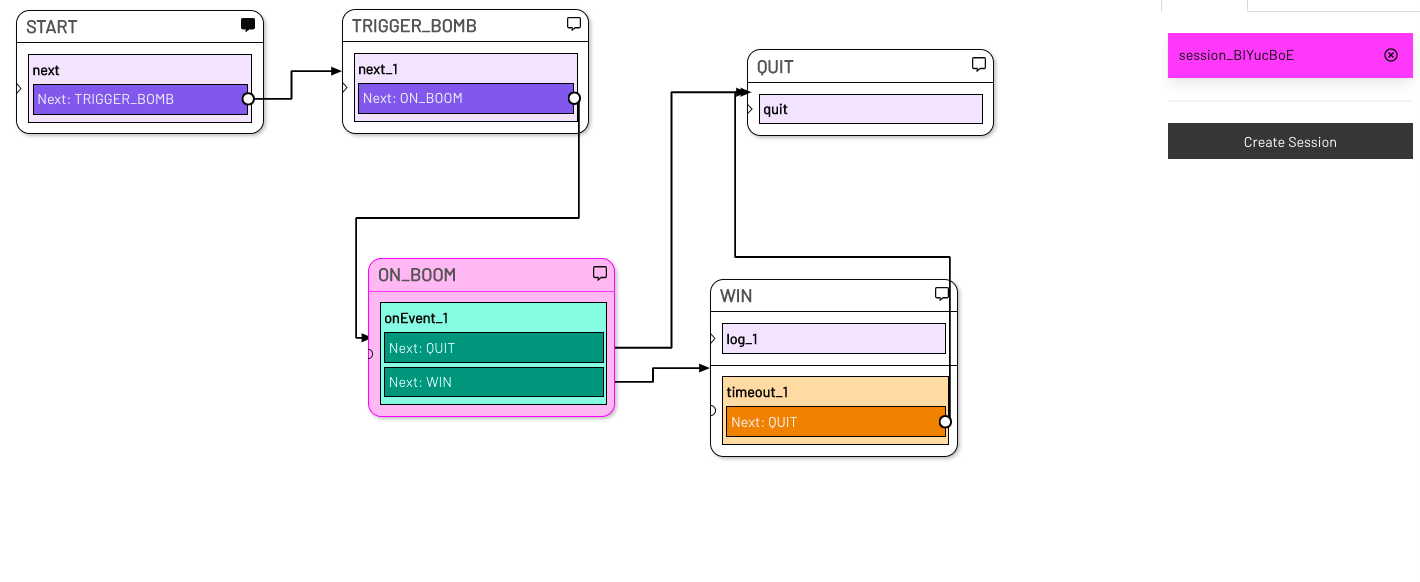
Now when the bomb prop sends a HTTP GET request to our webhook and sends
?solved=truewith it, we see how the WIN state is triggered.
There are more possibilities to read the content of the bomb event (e.g. we can find the data of the onEvent also in the ACTION BAR under Variables and can edit it there etc.).
So now we can have our props talk to adaptor:ex as well as send signals from adaptor:ex to external devices.
Of course you can also control other software on the network and on the same computer and even 3rd party services on the network (although for the latter we usually recommend to program your own plugin if possible).