Storytelling with Telegram and adaptor:ex
adaptor:ex is part of the MACHINA COMMONS project and is funded in the program "Digital Development in the Cultural Sector" of the Berlin Senate Department for Culture and Europe.
adaptor:ex is an open-source software engine that enables the implementation of interactive theater games and installations. A part of it are participatory performances and multimedia chat adventures within the messaging service "Telegram".
Advance
We assume that you or a technician:in has already set up a Telegram account with default level. If not, you can find the Tutorial here.
adaptor:ex can be operated to a large extent with a browser (we recommend Chromium/Chrome or Firefox). To test your level, of course, you need the messenger Telegram - either as an app on your smartphone or on your computer.
Step by step
Basics
-
create a new level in 'Game > overview' by clicking on 'NEW LEVEL' and give it any name.

-
Then click on your new level to enter the level editor:
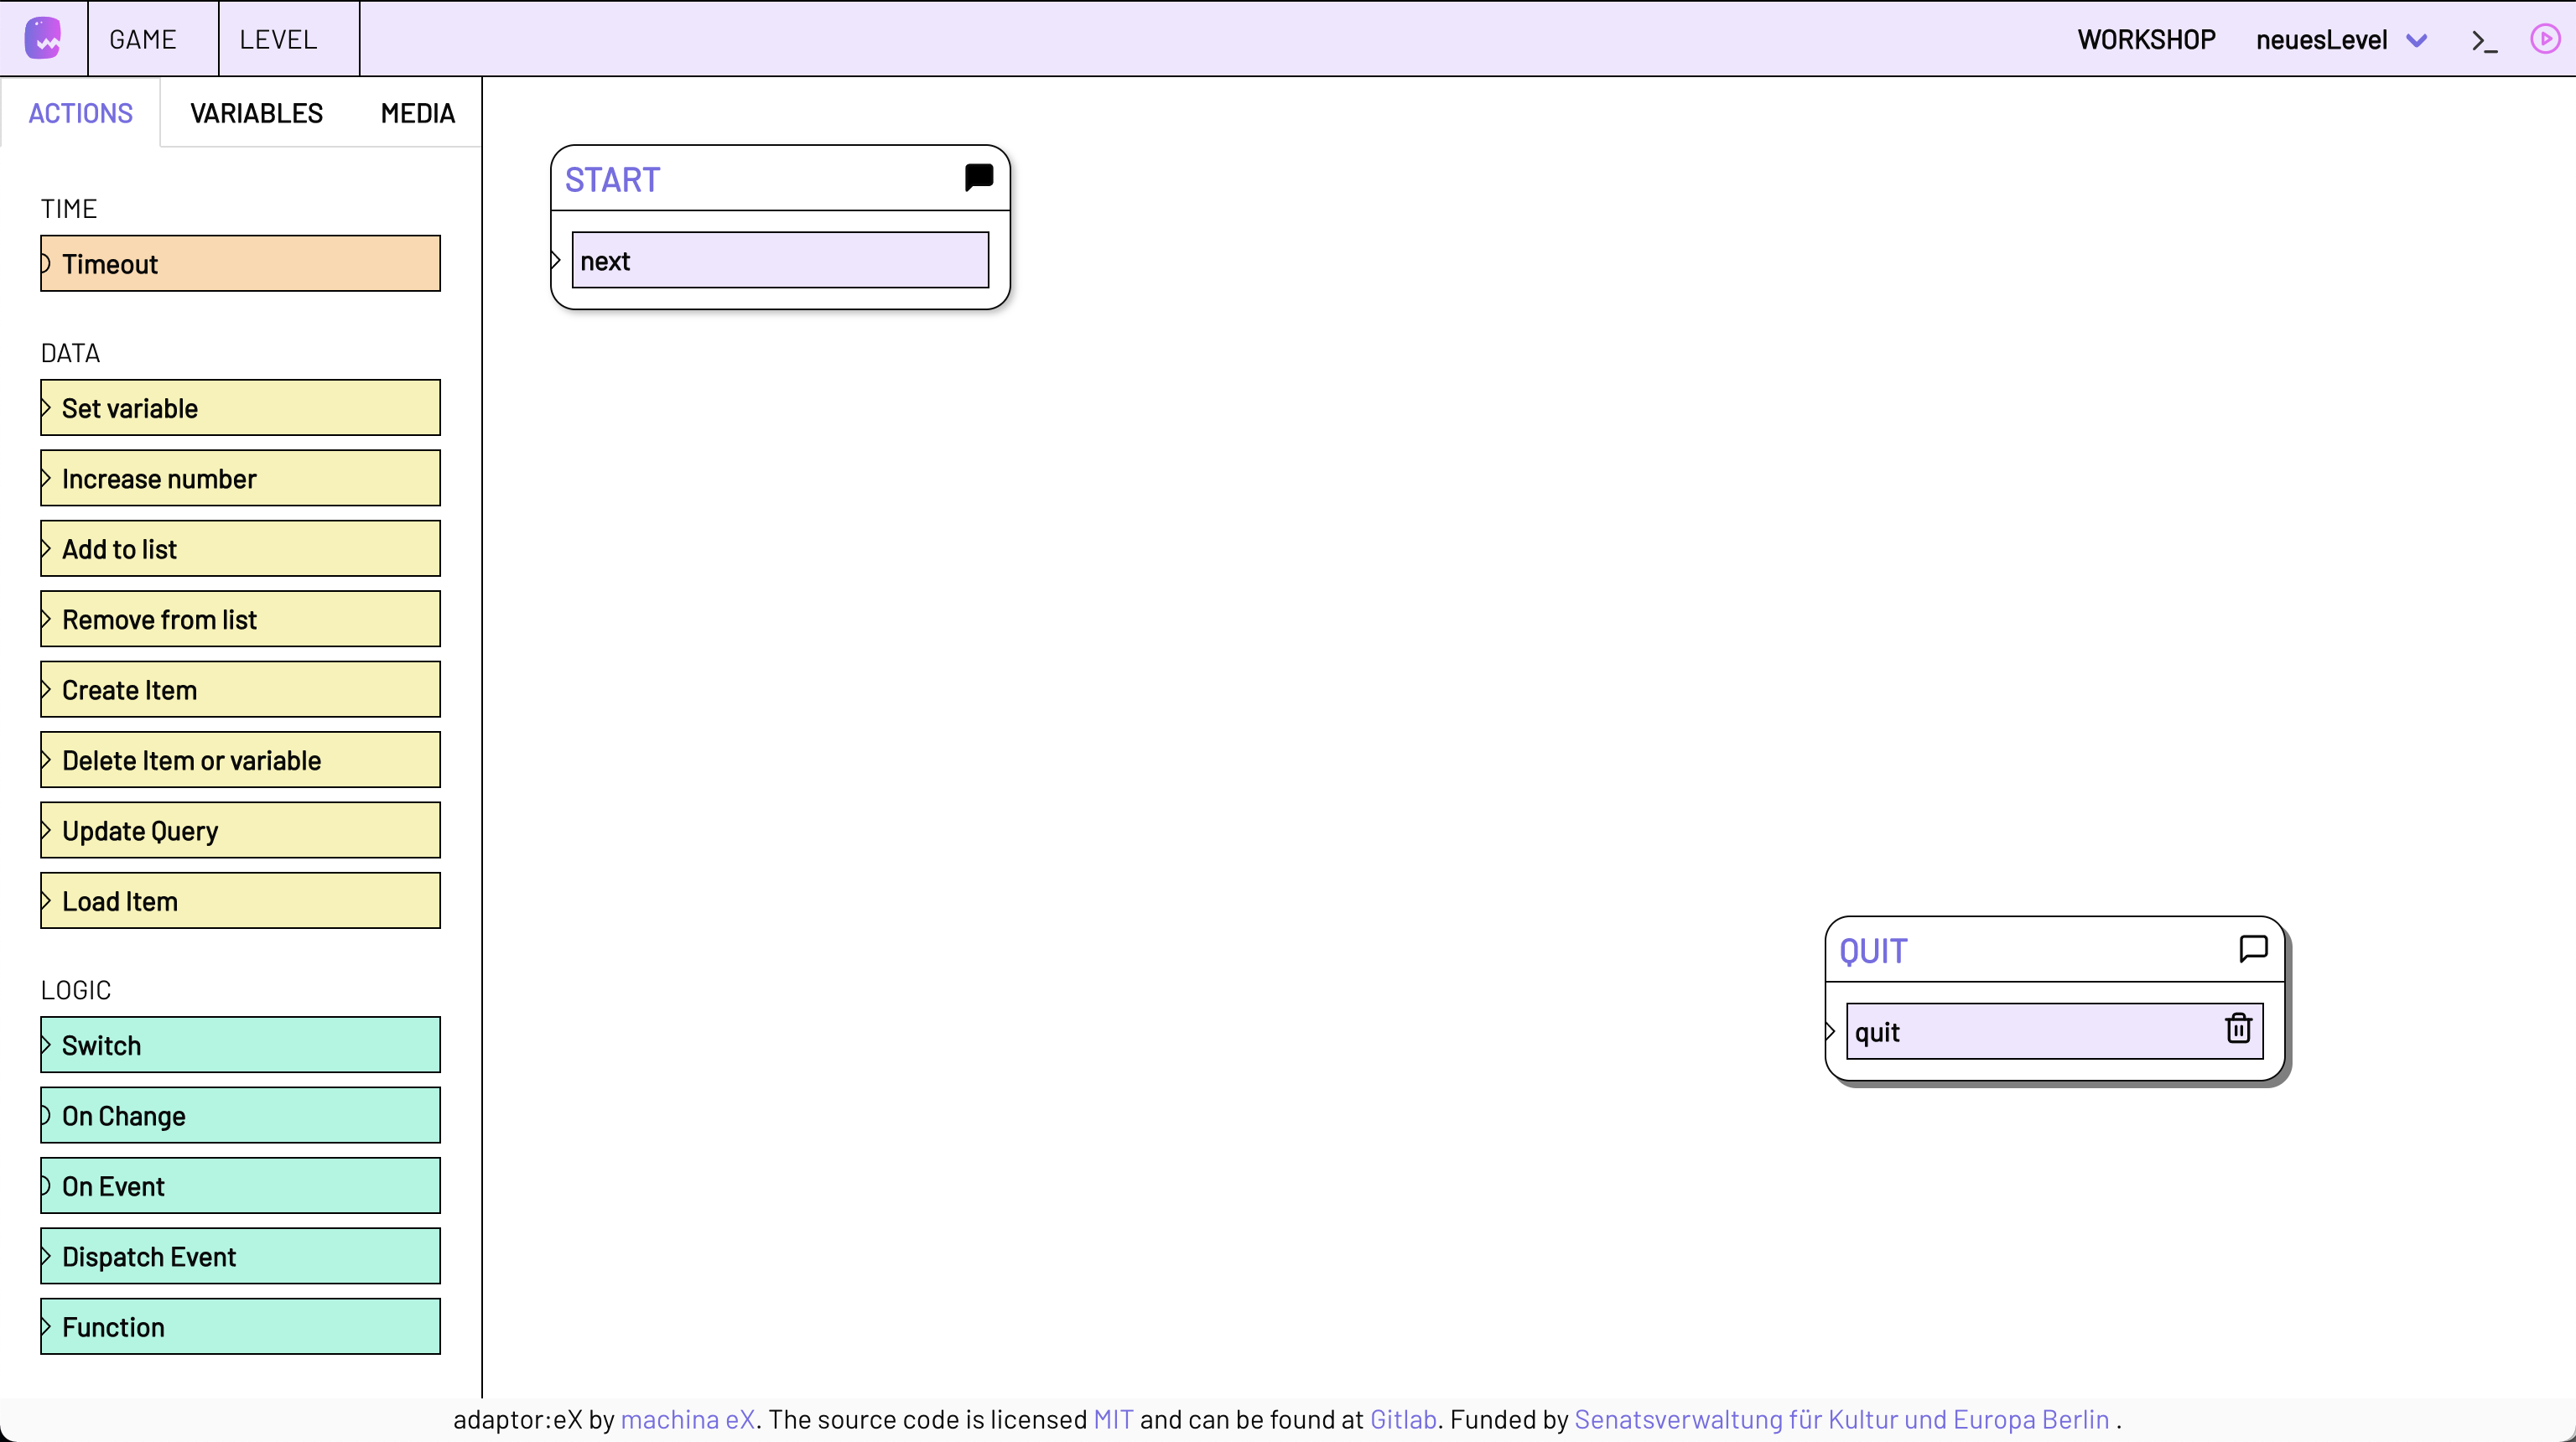
-
To learn the basics of LEVEL EDITOR, you should first look at the following explanation:
It's a good idea to keep the editor basics open later, in case you want to look something up again during this tutorial.
Here we go
-
We'll start with something simple: Scroll down in the toolbar under ACTIONS until you see Send Message under TELEGRAM. Then drag and drop the SEND MESSAGE ACTION onto a free area of the Stage.
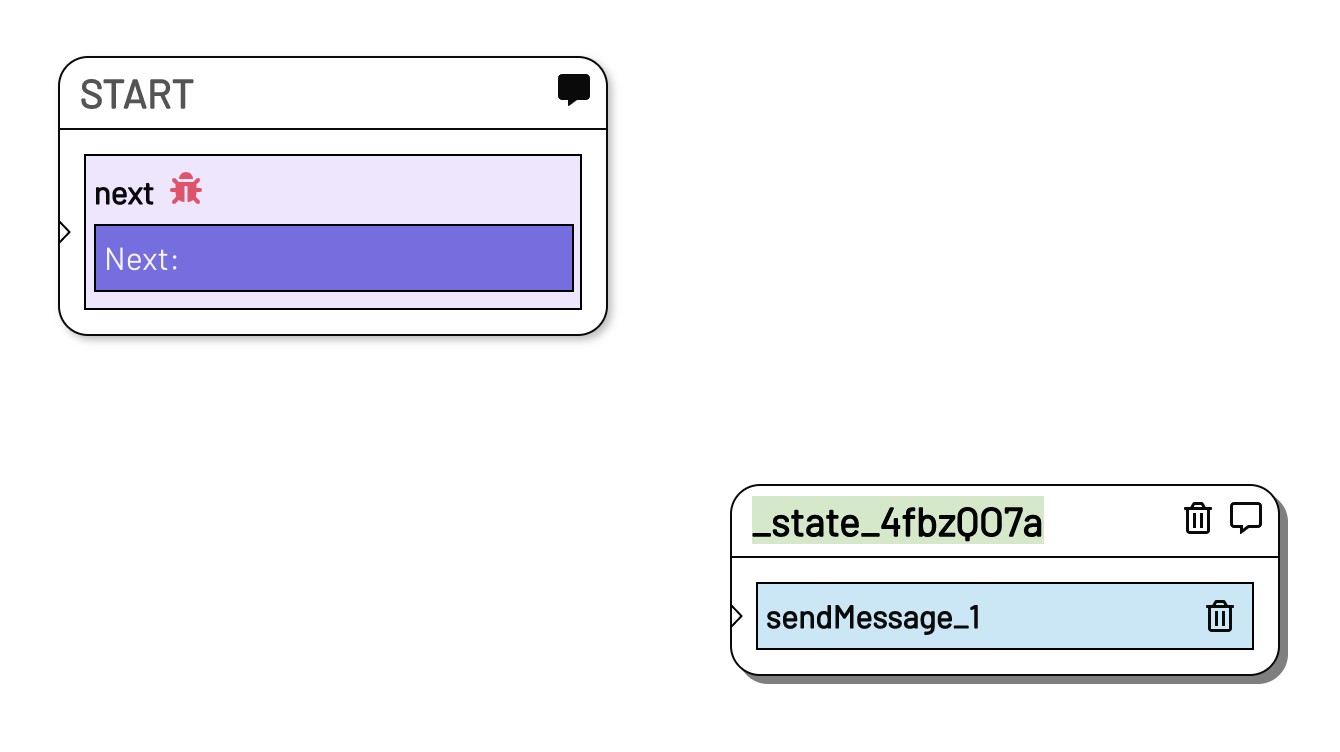
Now you can rename the newly created STATE. We will call it "WELCOME":
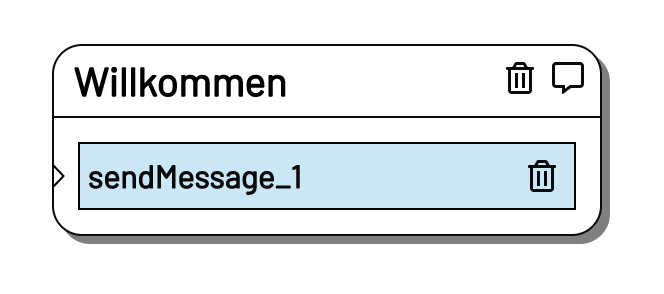
STATES can be moved on the stage via drag and drop: Simply hover over the header (!) with the mouse pointer, click and then move.
-
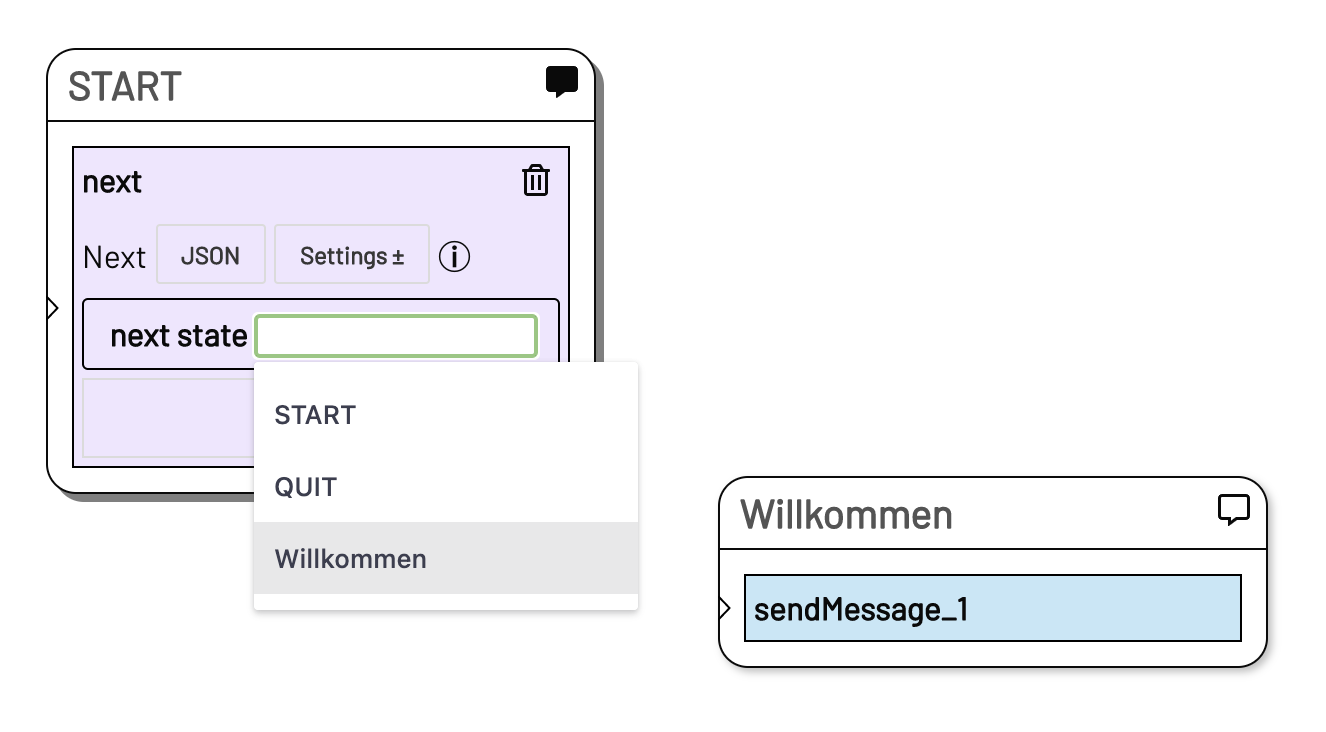
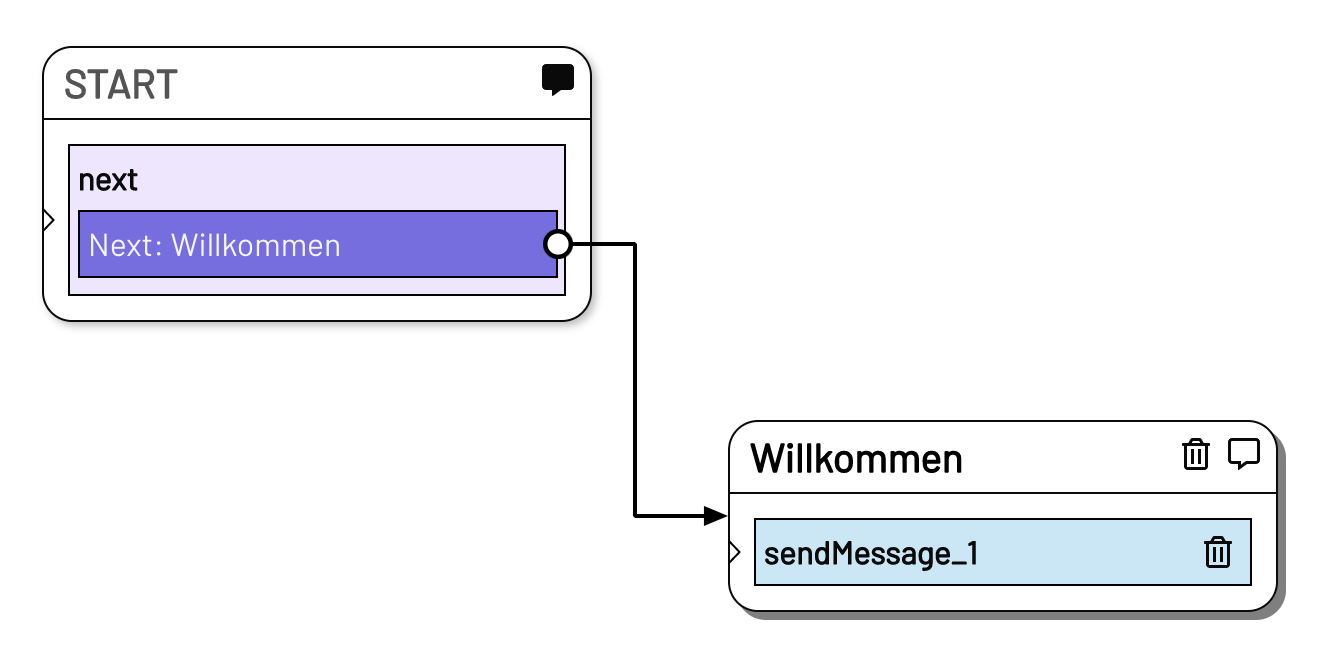
Now we want to work on making something happen in our level as well. To do this, we need to connect the START STATE with our new STATE WELCOME.
To do this, we open the NEXT ACTION, which is already ready in the START STATE, by clicking on the header of the NEXT ACTION. Click in the text field under "next STATE" - you can either write the name of the STATE that should follow the START STATE, or select it via autocomplete (you have to click once in the text field) - in our case "WELCOME". After that we click once somewhere on the stage - and that's it. Now the players go from the START immediately to our new STATE WELCOME:
-
In WELCOME we now want to send a message to the player who started our level. To do this, we open the Send Message ACTION and fill out the form as follows:
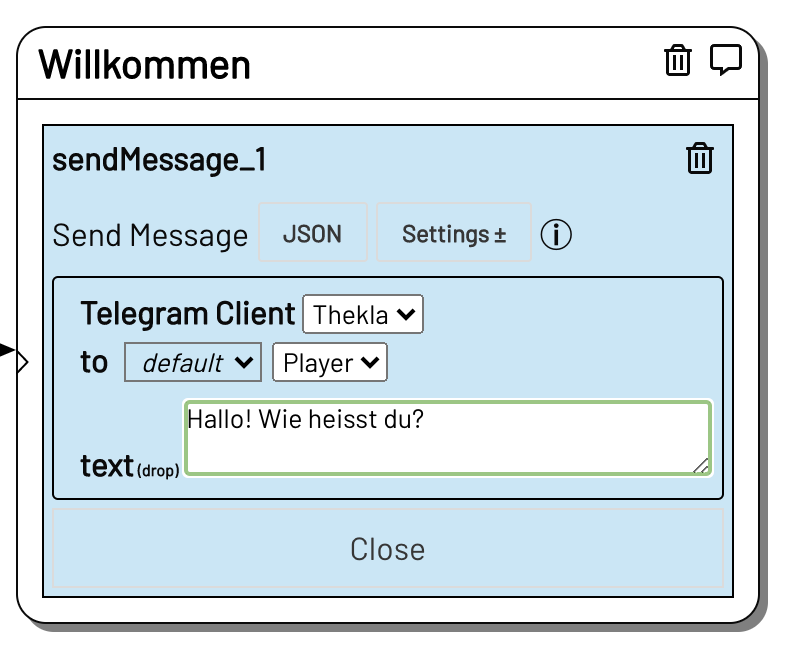
The telegram account is, in a way, our character, the sender of our messages. In our workshop level there is only one character, but in more complex games we could have several characters communicating with our players.
Under "to" we select "Player". This is how we decide who the Telegram message will be sent to. Again, we currently only have one player:in to choose from. But there could be more than one, e.g. a group.
Under "text" we can write a small text (the content of the message), in which we greet the player:in e.g. and ask for their name.
-
Now we drag a Next ACTION into our WELCOME STATE, open it and enter "QUIT" under "next state".
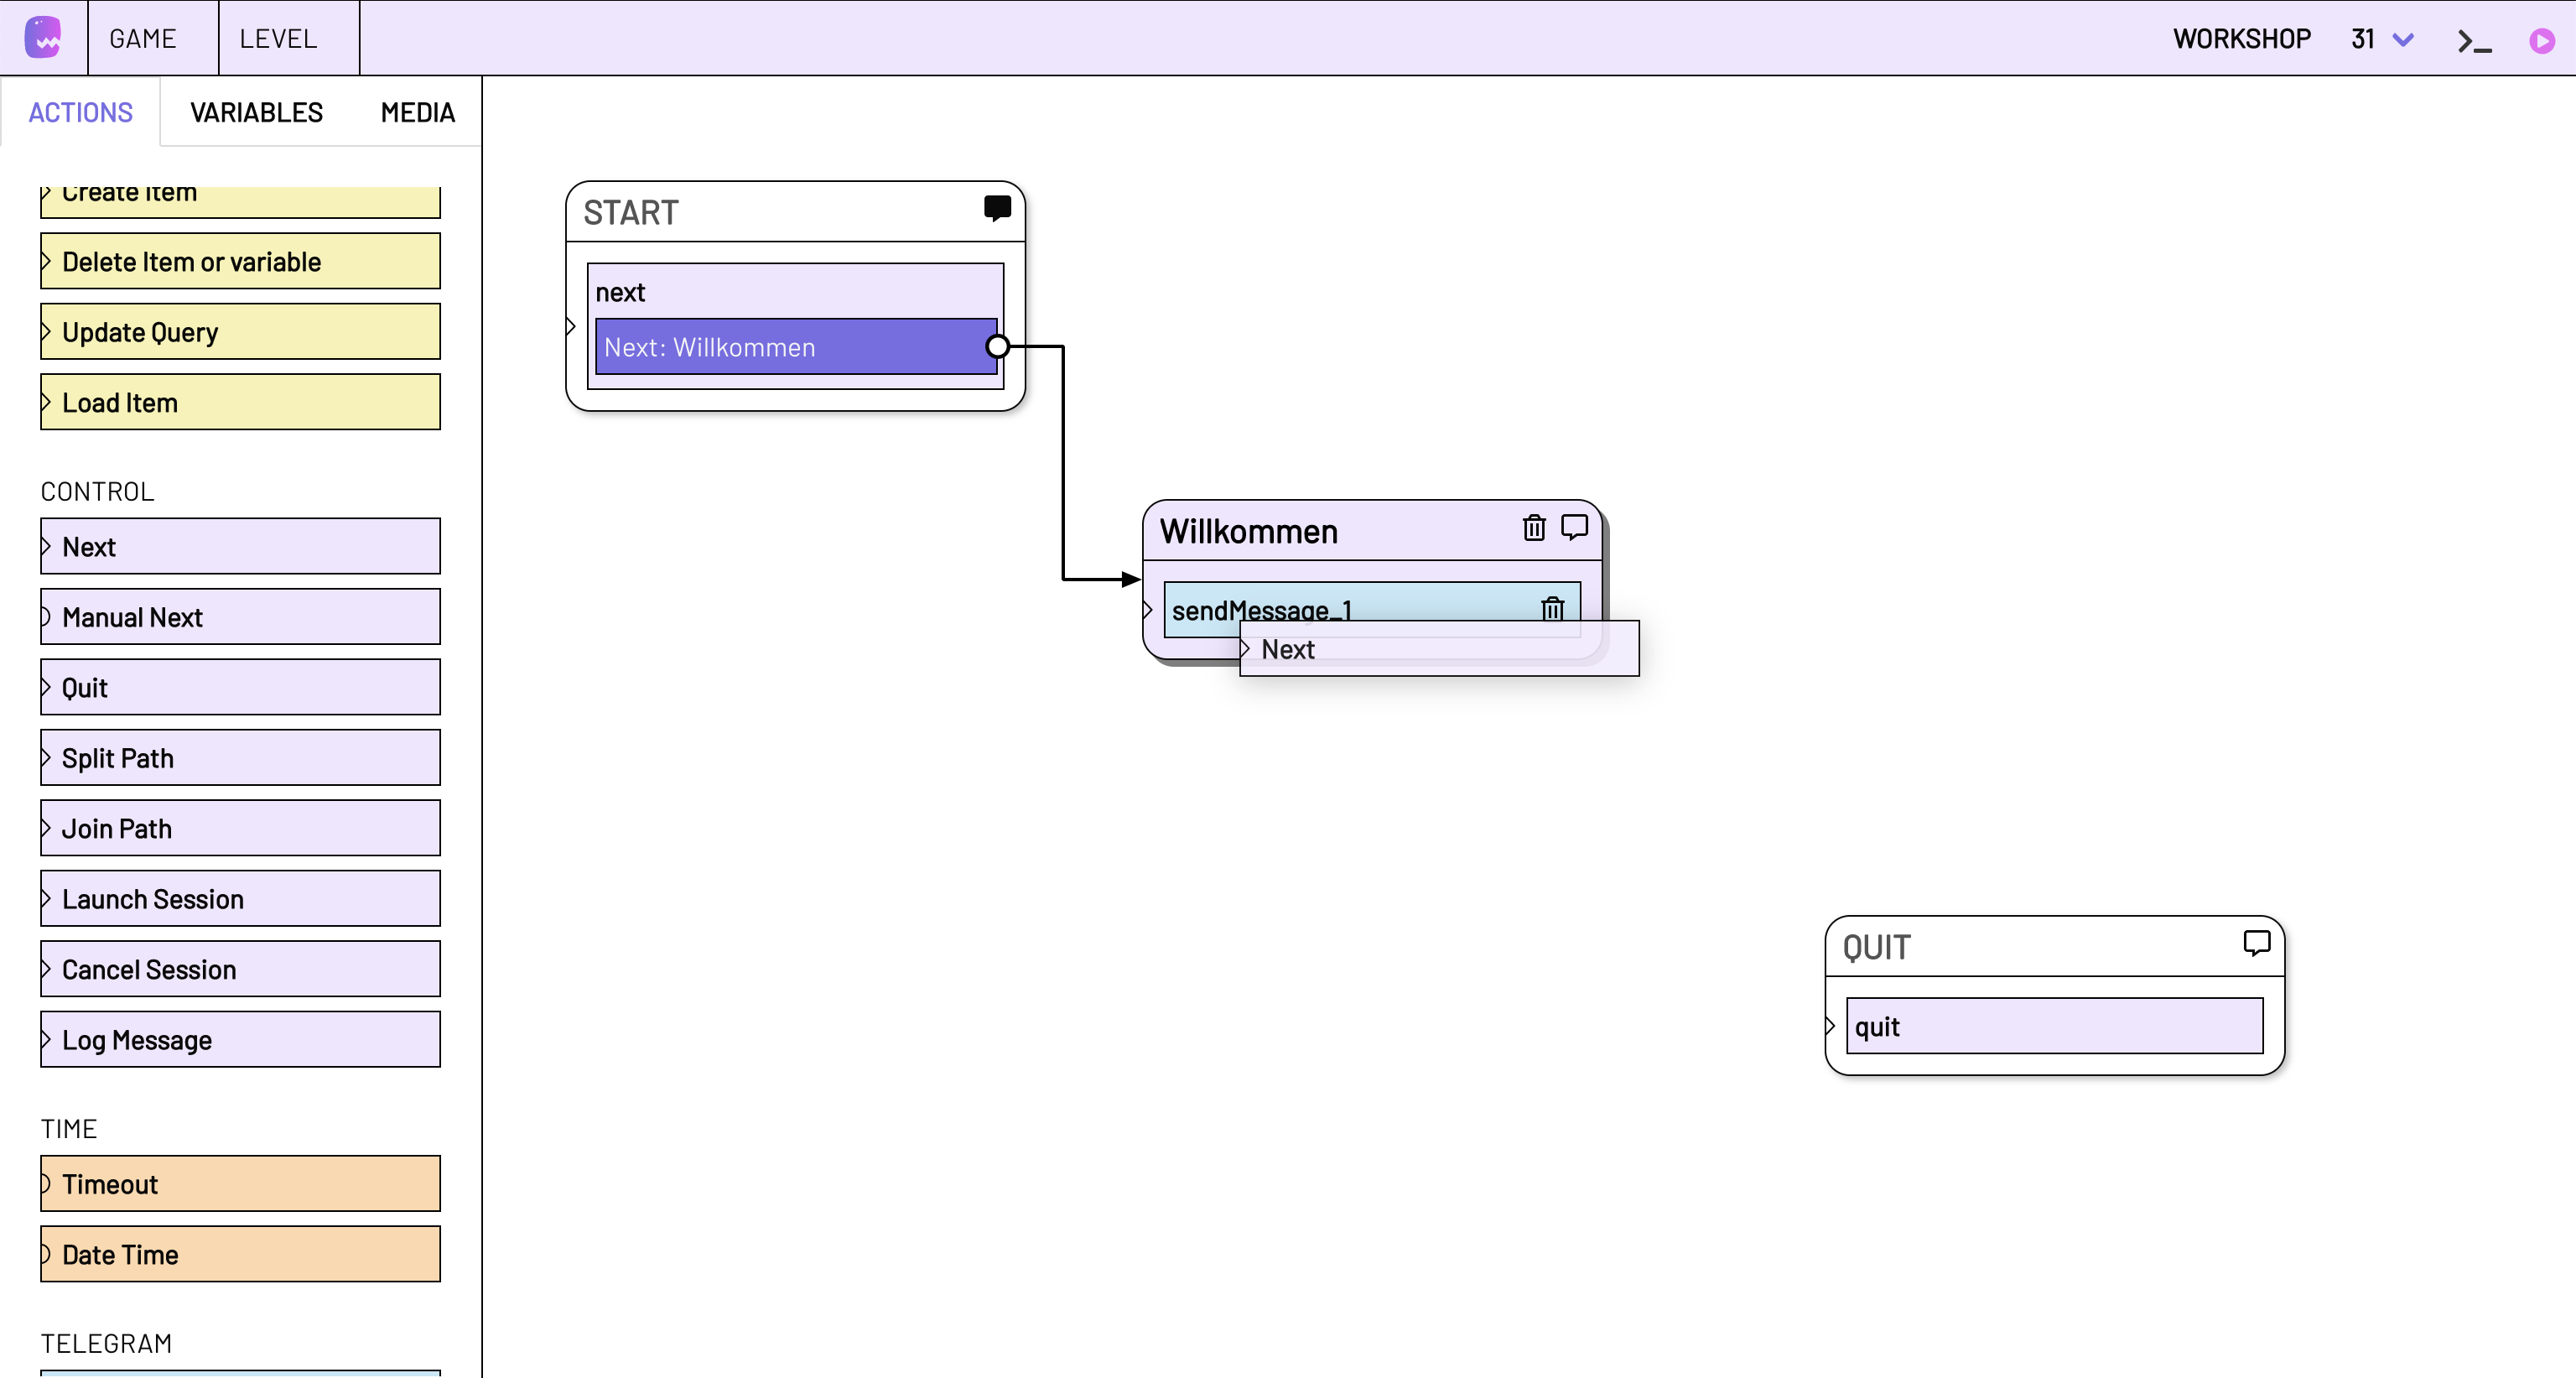
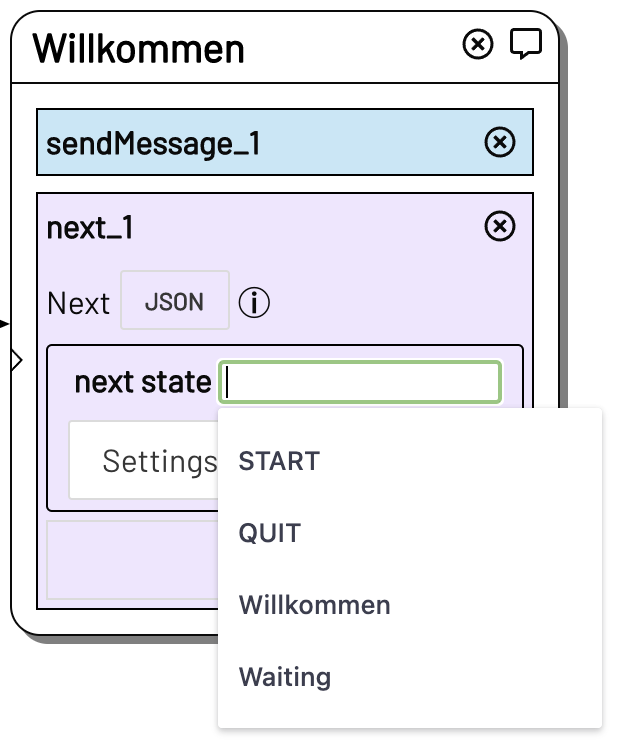
Now our level should be working as well.
This is roughly how it should look now:

-
Now let's test if everything works up to this point. To do this, we send the name of our level as a Telegram message to our account. In this tutorial, this is Thekla, our test character. To do this, you should create Thekla as a contact in the telegram APP.You can find Thekla's number at
Game > Settings > Telegram > Account.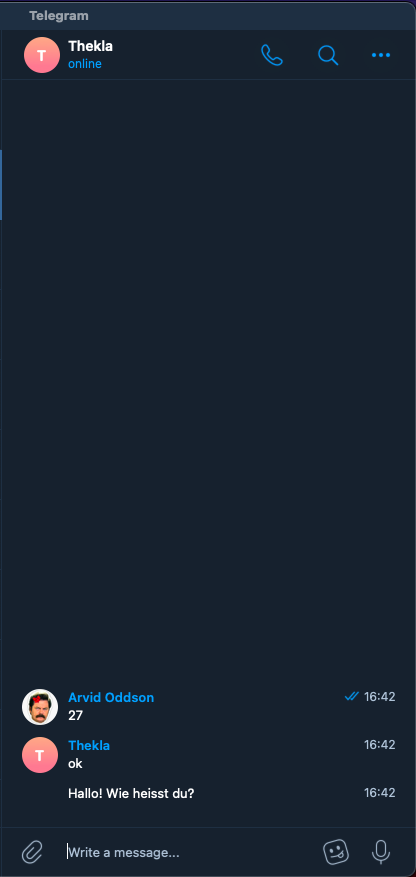
If everything worked, Thekla should reply on Telegram with Hello, what's your name? (or with the message you wrote).
Did it work? Then Congratulations!
User-Eingaben verwerten
Now nothing else happens in our level. It starts, the player gets our message and then it ends again. To make the whole thing a bit more interactive, we use a new ACTION in a new STATE:
We drag an On Incoming Message ACTION from the TELEGRAM ACTIONS in the toolbar to an empty part of the stage.
We now want to check the content of the message that the player sends to Thekla. The ACTION On Incoming Message does exactly that: The system waits for an input of the player and then checks according to rules to be defined by us, how it should handle the answer of the player.
We use an if/else query of conditions in the following. If you want to learn more about the basic principles of this, you can find an explanation of Conditions Queries with Conditions .
-
name the new STATE as you like, for example "REPLY" (that's what we'll call it in this tutorial from now on).
-
Link the STATES together so that your new REPLY STATE follows the WELCOME STATE.
-
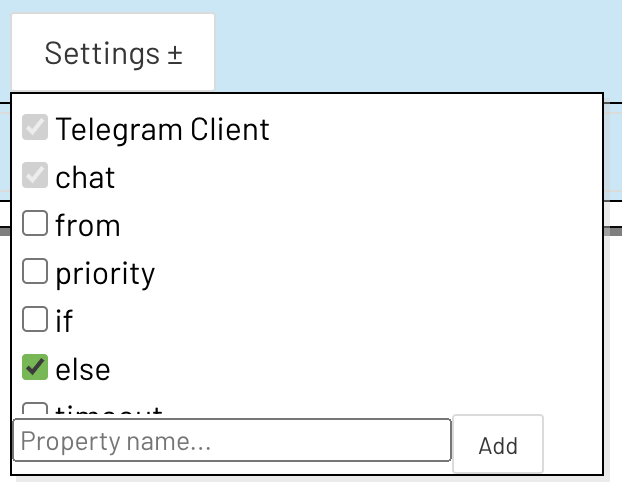
click on Settings in the On Incoming Message ACTION and select else. Then click Settings again to close. ("if" comes later, don't worry!).
-
We now see that an "else" block has been added to the ACTION. We will come to that in a moment.
If we now click on VARIABLES in the toolbar, we also see that new variables have appeared there: There are a whole bunch of boxes whose parent box is named just like your Incoming Message STATE. In our tutorial, it's called "REPLY", and below it is "onMessage-1". You may need to reload the page to see the new variables.
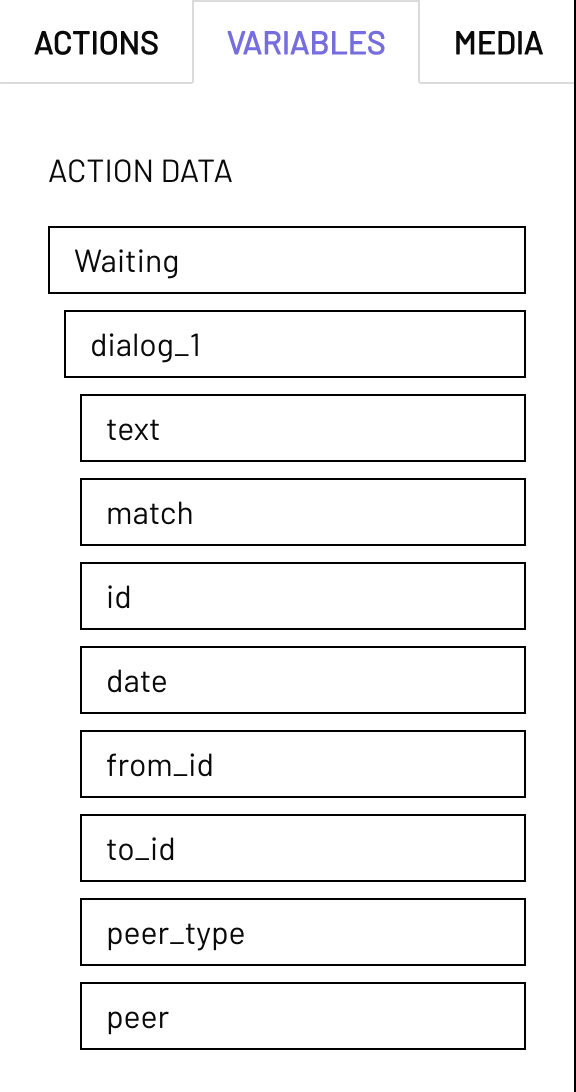
Here we find from now on the data (e.g. the inputs of the players), which are available to us from the STATE "REPLY" (of course always when the players have arrived at the STATE "REPLY" during the game).

-
We have asked the player for her name and from now on we want to address her correctly, so we use the reply text that the player sent to our account Thekla: To do this, we need the response that was received after Thekla's first message. Since adaptor jumps to the STATE "REPLY" directly after "WELCOME", the next message of the player will also arrive in this STATE. adaptor stores the incoming message as VARIABLE "text" of onMessage_1. So we use the mouse to drag the VARIABLE text from the "onMessage_1" into the respond text field of the else block (as seen in the image above). With this, we use the player input in our next message. If the player answered the question meaningfully, the input should be her name.
In the text box,
[[state.REPLY.onMessage_1.text]]now appears in square brackets. The square brackets mark variables and similar data. (We could, of course, just type the variable into the text field ourselves, but drag & drop saves us from typos).
-
Now write a greeting text - for example "Hello" - in front of and/or behind the variable.
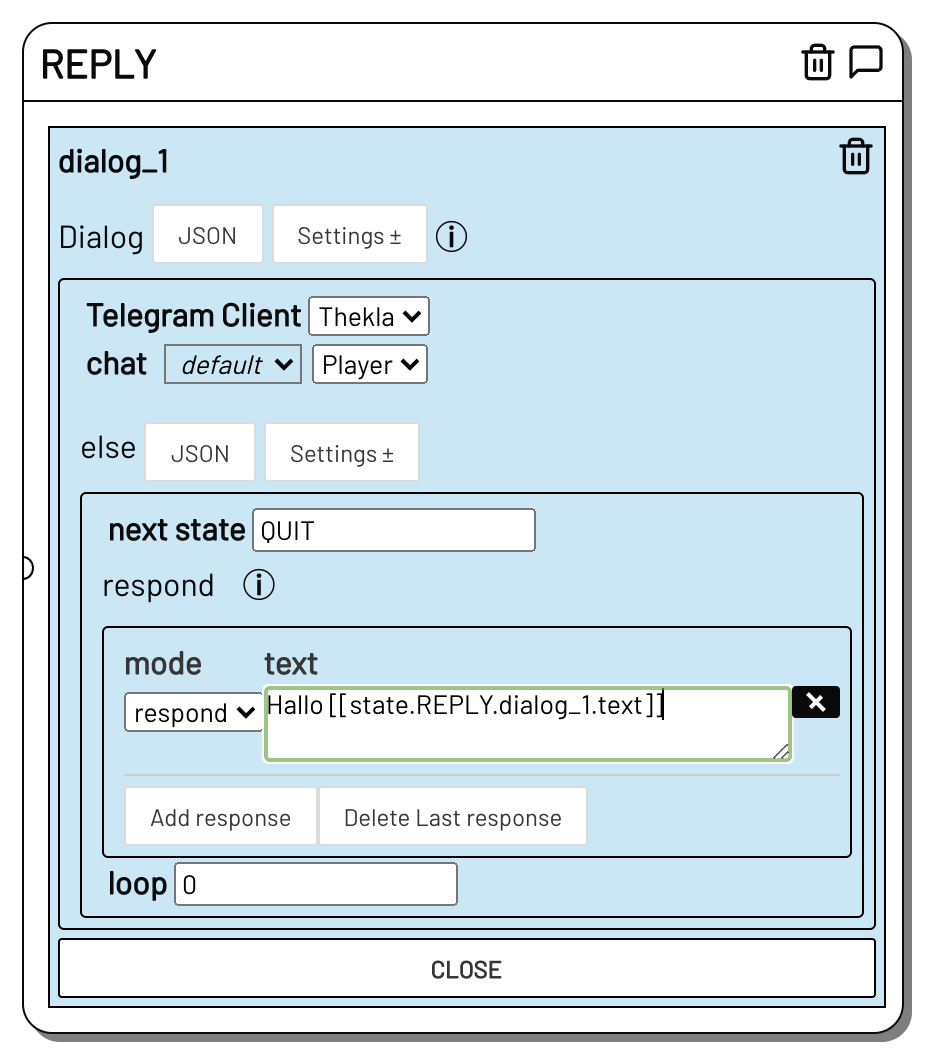
Everything inside the square brackets will be replaced by the entered data in the game, for example. Everything without square brackets will be sent as a response (respond) exactly as it is written in the text field.
-
Now enter "QUIT" under else > next state, so that the level will be ended automatically. You can now finally test again. Send the name of your level to Thekla again. Now she should answer as follows:
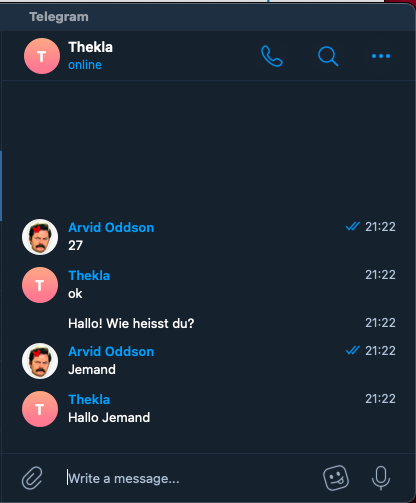
As you can see, the level saves your input when you arrive at the STATE "REPLY", and then combines it with the greeting text in the respond. Yay!
-
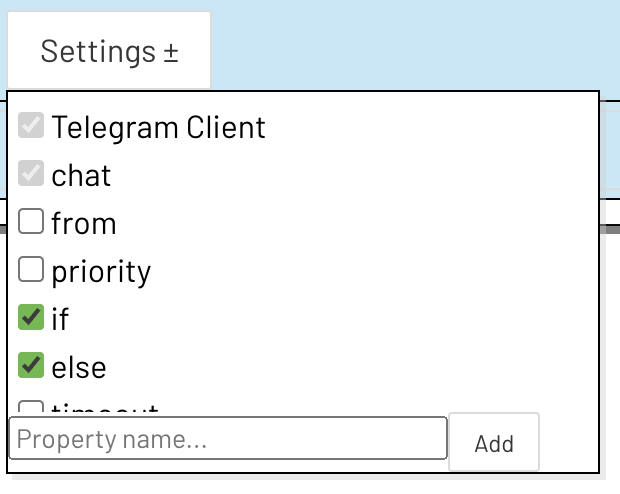
In order to react only to certain inputs and not simply to every conceivable input, we need an "if" condition in addition to the "else" condition: Open the onMessage_1 ACTION inside the STATES "REPLY". Now click again on Settings of the Telegram Account and add if:
-
Now an if block appears inside the ACTION above the else block. First add a new condition with add condition. Select contains in the upper dropdown menu if it is not already selected. Now, below that, in the contains block, you can type in the text box what you want the magic magic word to be to silence Thekla. For example, "ruhe" ("silence"). And under next state you enter which STATE should occur if the incoming message contains the string "ruhe" ("silence") - for example "QUIT".
Under respond you enter the text Thekla should reply with before the next STATE occurs, for example "ok, ich gebe Ruhe!" ("ok. I'll be quiet!")
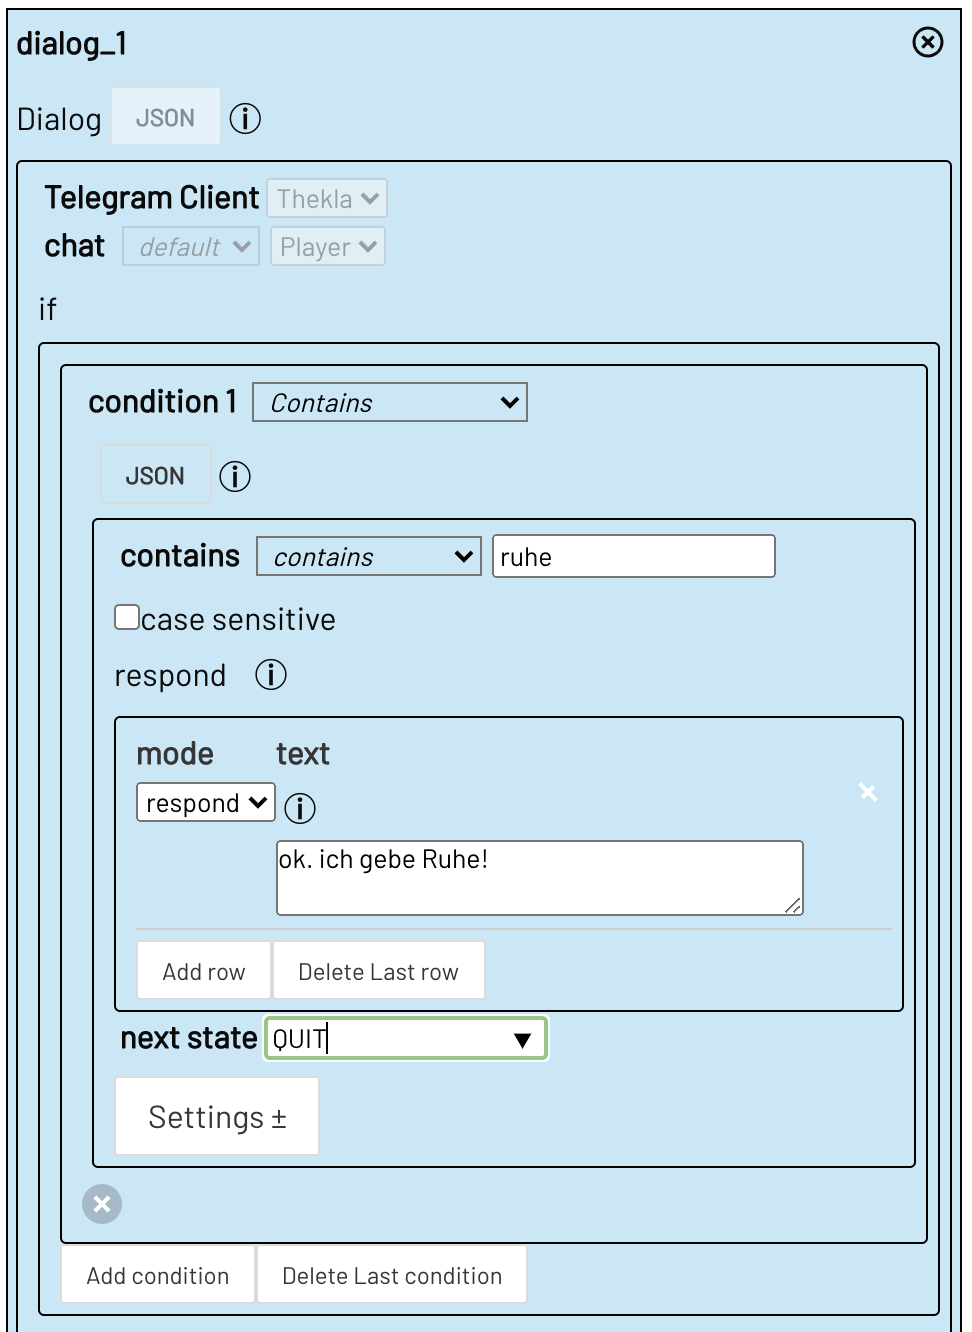
Now you have built a filter with if/else: If you now send Thekla any text containing the string "ruhe" (if), she will reply: "ok. I'll be quiet!". To all other incoming messages (else) Thekla will reply as before. You can add as many if-conditions as you like and build huge interactive narratives this way.
More Telegram special features
Now you have learned the basic functions and the interface of adaptor:ex and built your first Telegram level with the ACTIONS Send Message and On Incoming Message. But in the toolbar (left) under ACTIONS you can find more TELEGRAM ACTIONS with special functions. How Send File & Send Geo Location work, you will learn in this tutorial .
There are many more ACTIONS and special functions. For example, you can also define your own variables and query them later with [[myVariable]] in square brackets - and and and ...
Testing with session view
If you have problems, you can read here how to troubleshoot with the session view in live mode.
adaptor:ex can do much more than Telegram: control stage lighting, control interactive props, communicate with other software (lighting programs, sound programs, etc.) and much more. If you want to learn more about it, just have a look at the other pages!